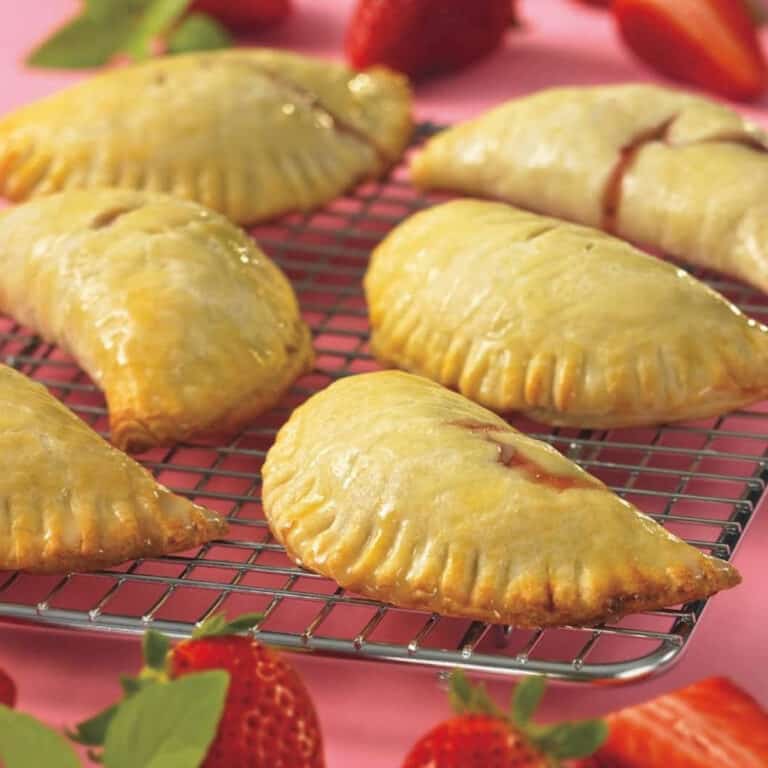
Flaky Homemade Pop Tarts Recipe (choose your filling!)
Delicious Homemade Pop Tarts will take you back to Saturday morning cartoons or your after school snack, when you might have gotten a store-bought version of these sweet pastries as a special treat. This easy-to-follow recipe will allow you to customize your own homemade pop-tarts and fill these flaky rectangular pastry crusts with any sweet filling you crave (see below for some of my favorites!)

Top Tips for Making Homemade Pop Tarts That Beat The Store-Bought Kind
I know a thing or two about making mini pies, since I wrote an entire cookbook about them! 175 Best Mini Pie Recipes features several pop tart recipes, along with one for this universal pop tart crust. Here are my top tips for making store-bought pop tarts a thing of the past!
- Take your time: Yes, enjoying a homemade real pop tart requires an extra bit of work vs. a boxed one, but the results are worth it. I've outlined every step in detail to help you along the way, so give yourself enough time to follow the directions carefully and chill the dough properly (more on that below.)
- Don't overdo the filling!: The proper amount of filling for my pop tarts is about 2 tablespoon each, otherwise they may be difficult to seal properly. Cutting small holes in the top of the pop tart before baking helps the steam to release so the filling doesn't burst through the crust.
- Keep the dough cold: As with a homemade pie crust recipe, it's important to keep your dough cold throughout the rolling and shaping process so that the dough holds its shape while baking. If you feel that the dough is getting too soft at any point, then return it to the refrigerator for 15 minutes before continuing.
- Cut yourself some slack!: Don't worry if your pop tarts aren't perfectly rectangular or evenly shaped like the "real thing." Mine never are. They will still taste 10 times better!
Creative Ways to Fill your Homemade Pop Tarts
Filling ideas for these treats are limited only to what you have in your pantry or whatever flavor you crave.....just be creative. Here are a few of my favorites:
- Chopped bittersweet chocolate and marshmallows for a s'mores inspired pop tart
- A tablespoon of jam and peanut butter (I do love a PB&J!)
- Raspberry, apricot, peach, or strawberry preserves
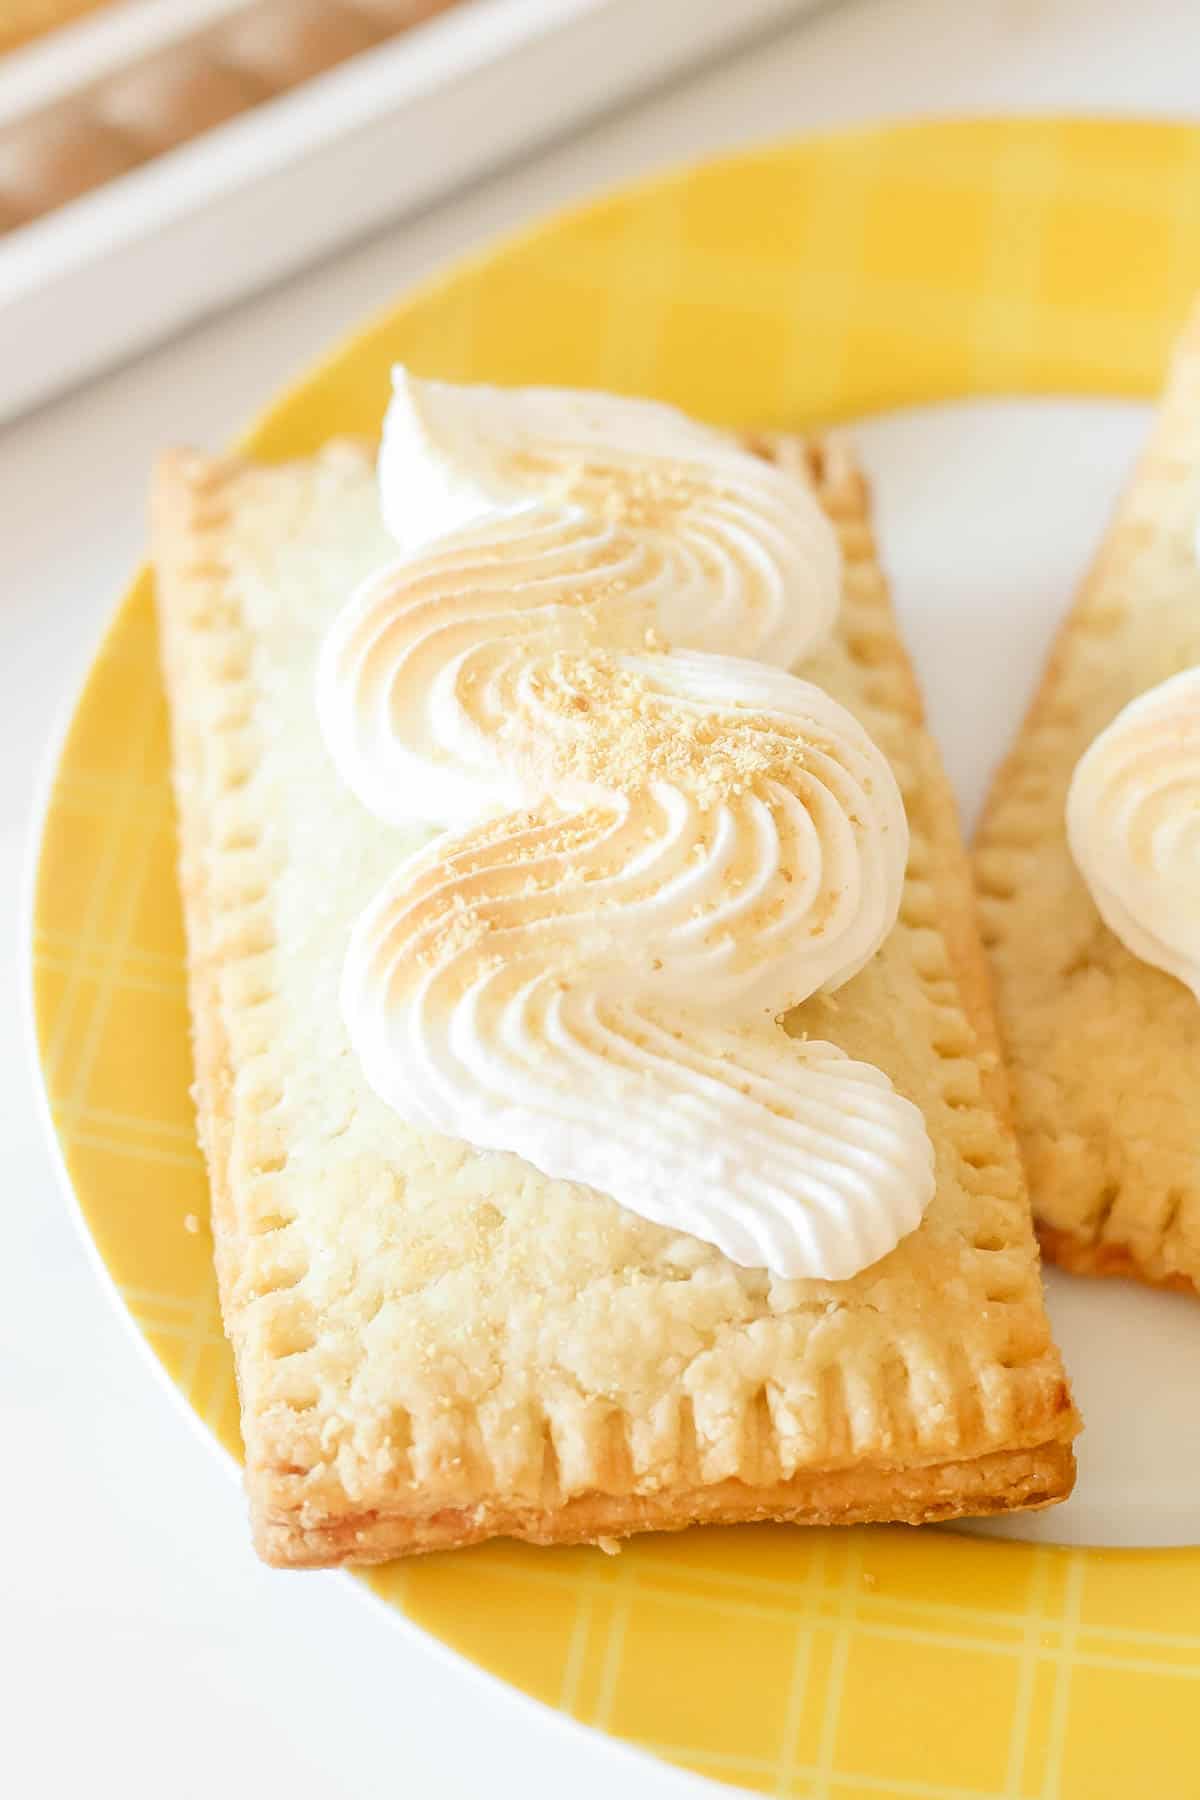
- Lemon curd (pictured above!)
- Traditional brown sugar cinnamon filling
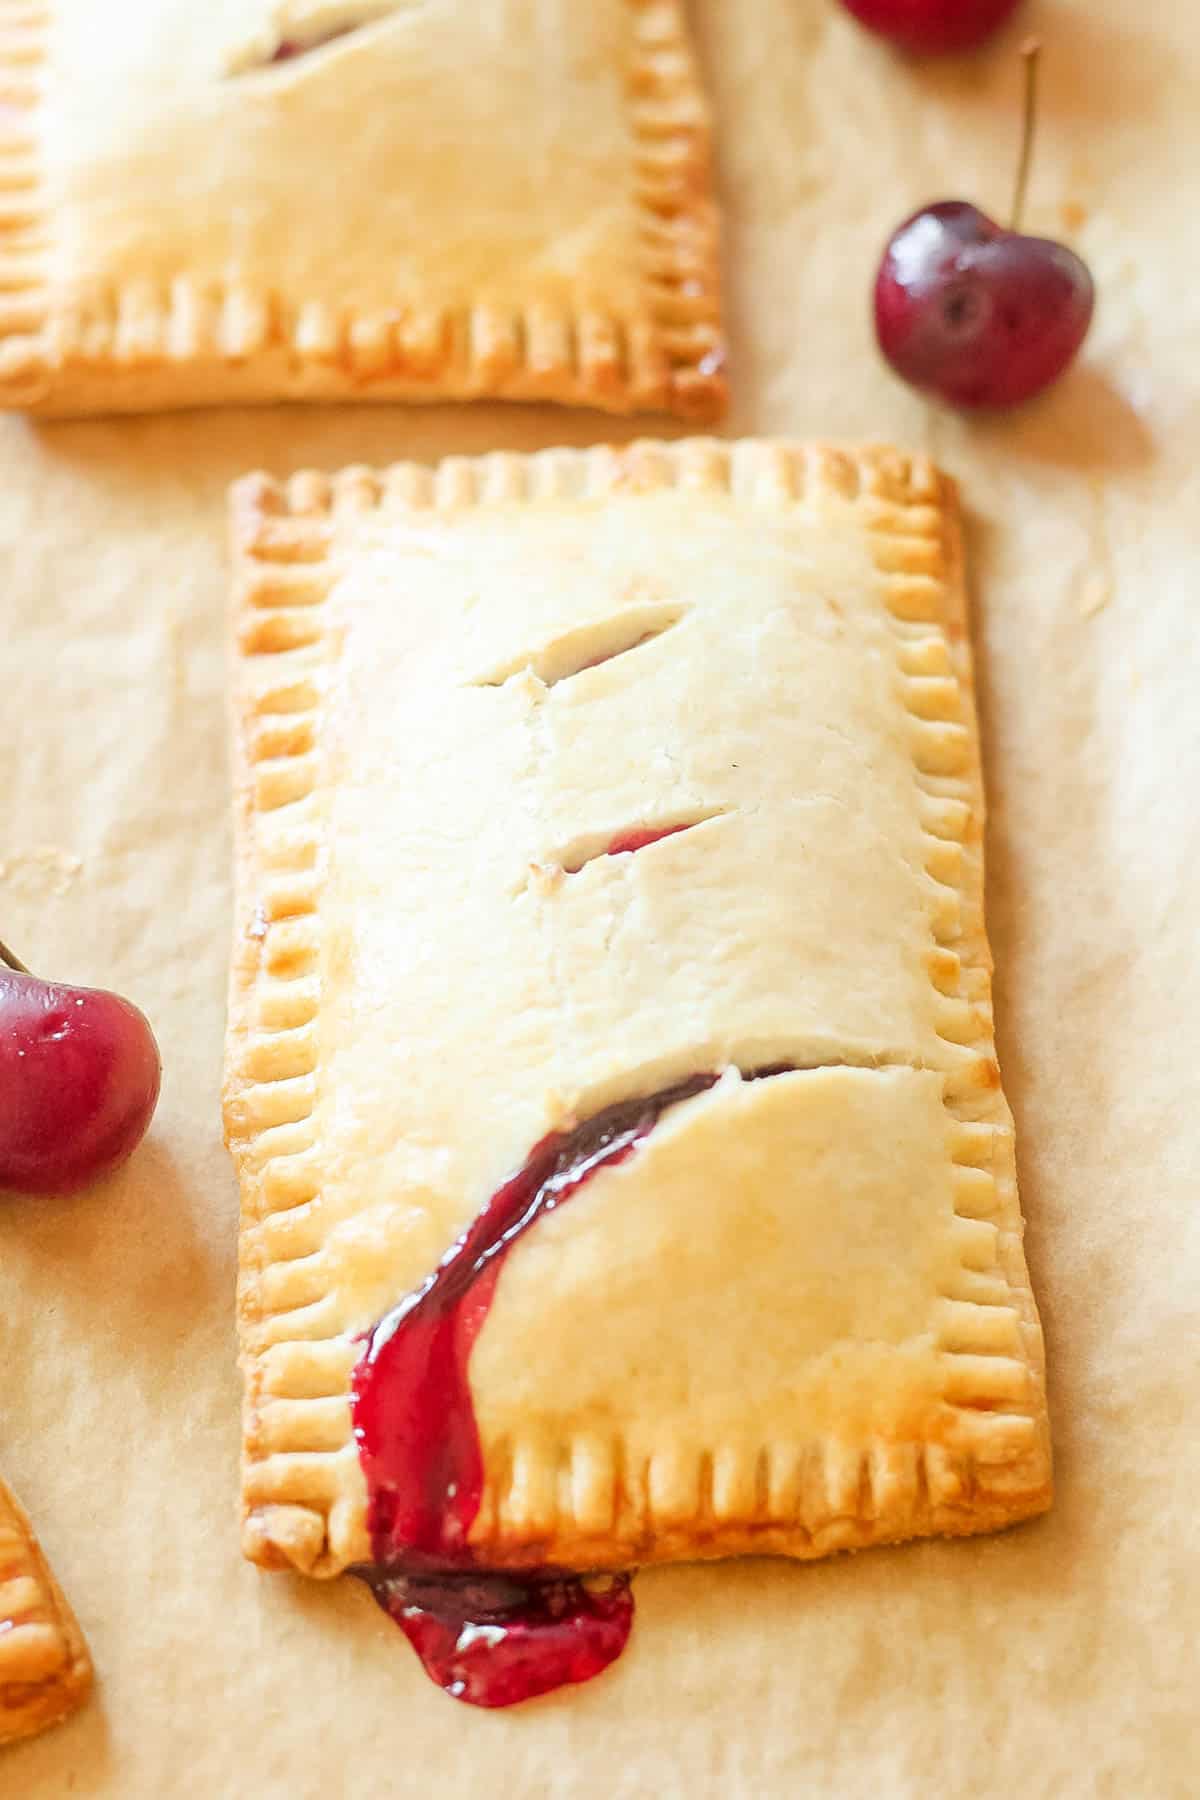
- Diced fresh banana, chopped peach, blueberry, cherry, or strawberry filling
- Pumpkin butter and chopped pecans
- For something a little different, try a pizza-inspired savory filling with cheese and sauce!
Ingredients and Special Equipment
Please refer to the full recipe card at the bottom of this post for specific quantities.
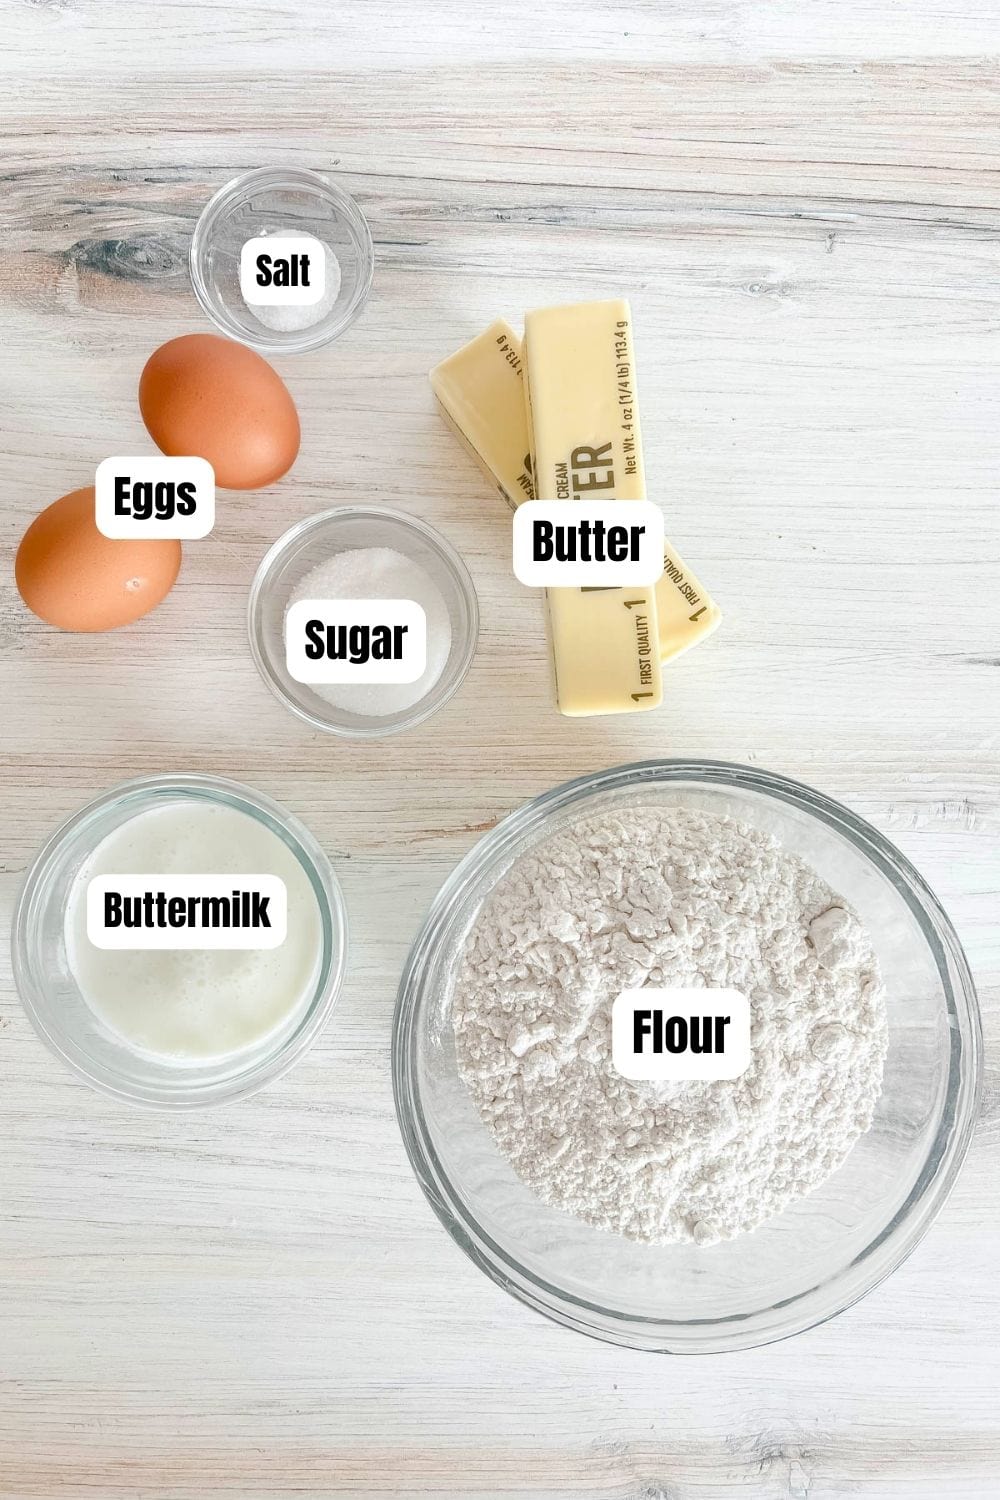
Ingredient Notes for Pop Tart Dough
- Flour: For gluten-free pop tarts, use my favorite Gluten-Free Pie Crust recipe
- Butter: Try to use a good quality butter for this recipe (such as Challenge or Plugra.) The quality really comes through in the flavor of the pastry. Be sure to keep your butter cold throughout the shaping process so that the pop tarts keep their shape when baking.
- Buttermilk: Adding buttermilk to pastry crusts is a little trick that I use to keep them tender and flaky. If you don't have buttermilk, mix 1 cup (250mL) regular milk with 1 tablespoon lemon juice or apple cider vinegar and let it sit at room temperature for 10 minutes.
- Eggs: You will only need the egg yolk for the dough, but you can store the egg whites for up to 5 days in the refrigerator (airtight container.) The egg wash requires a whole egg.
Recommended Special Equipment
- Measuring tape (optional but helpful): For measuring the sizes of the crusts. I keep an extra measuring tape in the kitchen at all times, as I find it helpful in many baking recipes.
- Rolling pin
- Paring knife or pizza wheel: For cutting the rectangles.
- Parchment paper: Optional but helps to prevent burning while baking.
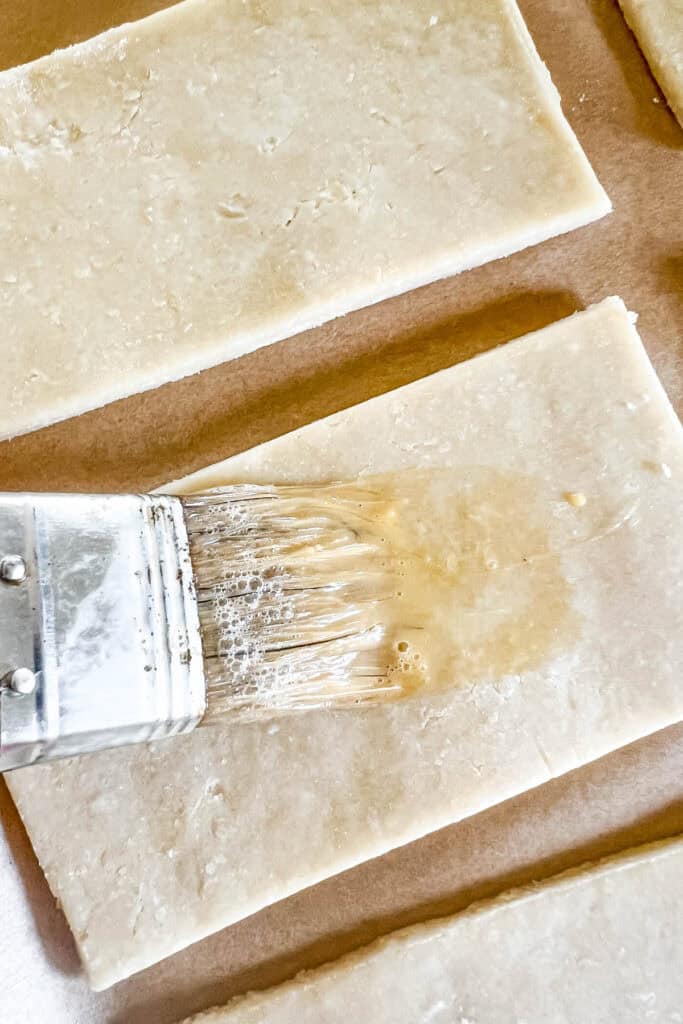
- Pastry brush
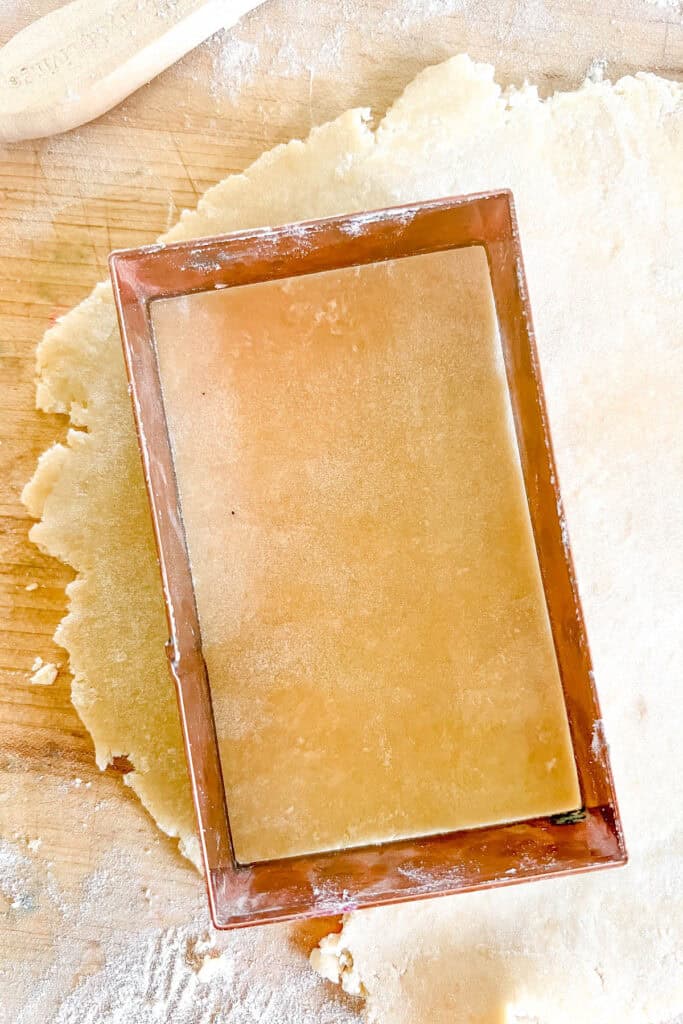
- Rectangular cookie cutter (optional): Using a cookie cutter for your pop tart crusts makes the shaping process easier so sizes are more consistent. Look for a size about 4X3 inches, like the one in this set.
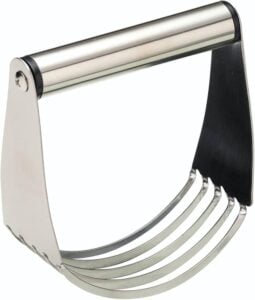
- Food processor: The easiest way to mix this dough is with a food processor fitted with the metal blade. See next section for alternatives if you don't have a food processor!
How to Prepare Pie Dough WIthout a Food Processor
- As with most pastry recipes, if you don't have a food processor, then you can mix the butter into the dough by hand. For this method, use a metal pastry cutter or pastry blender to work the cold butter cubes into the dough, or use your fingers to rub the butter cubes into the dough until it is the size of small peas.
- Another method is to use the larger holes of a box grater or cheese grater. Grate VERY cold (preferably frozen) butter into long pieces. Toss the pieces with your dry ingredients before adding your liquid.
Step By Step Photos and Instructions
Prepare the Pop Tarts Dough
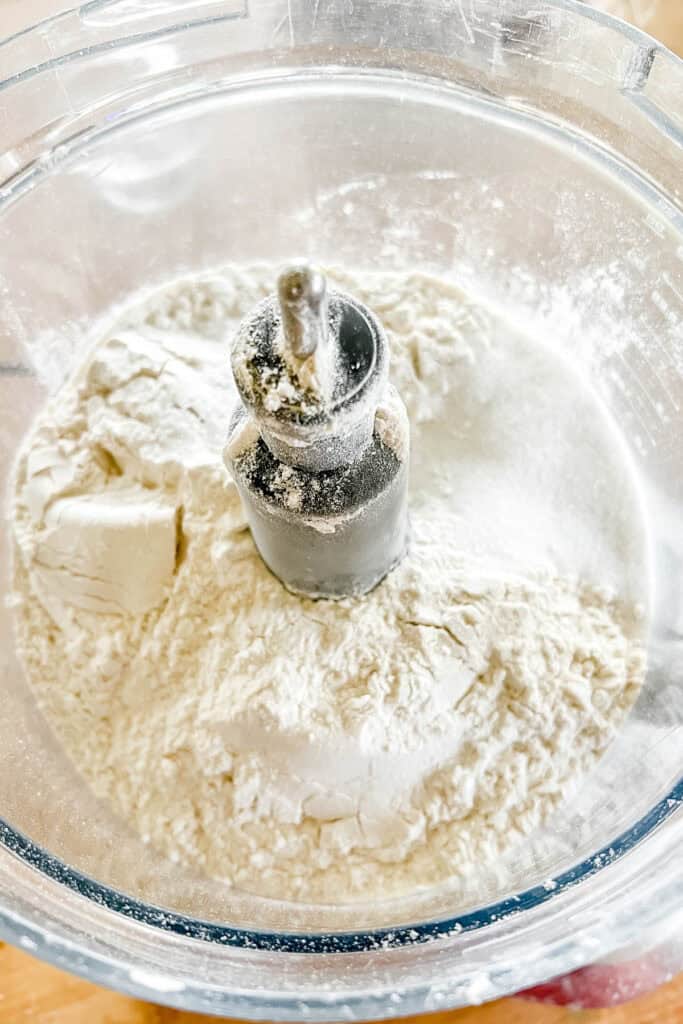
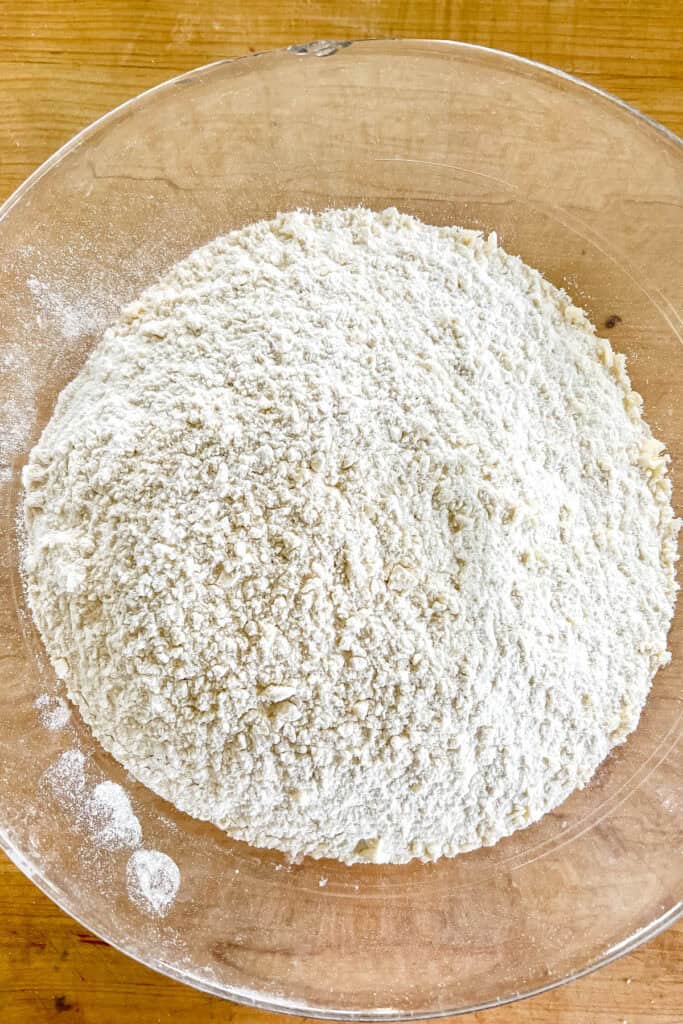
- In the work bowl of a food processor fitted with a metal blade, pulse flour, sugar and salt to combine. (If you don't have a food processor, see the Recommended Special Equipment section above for instructions for mixing by hand.)
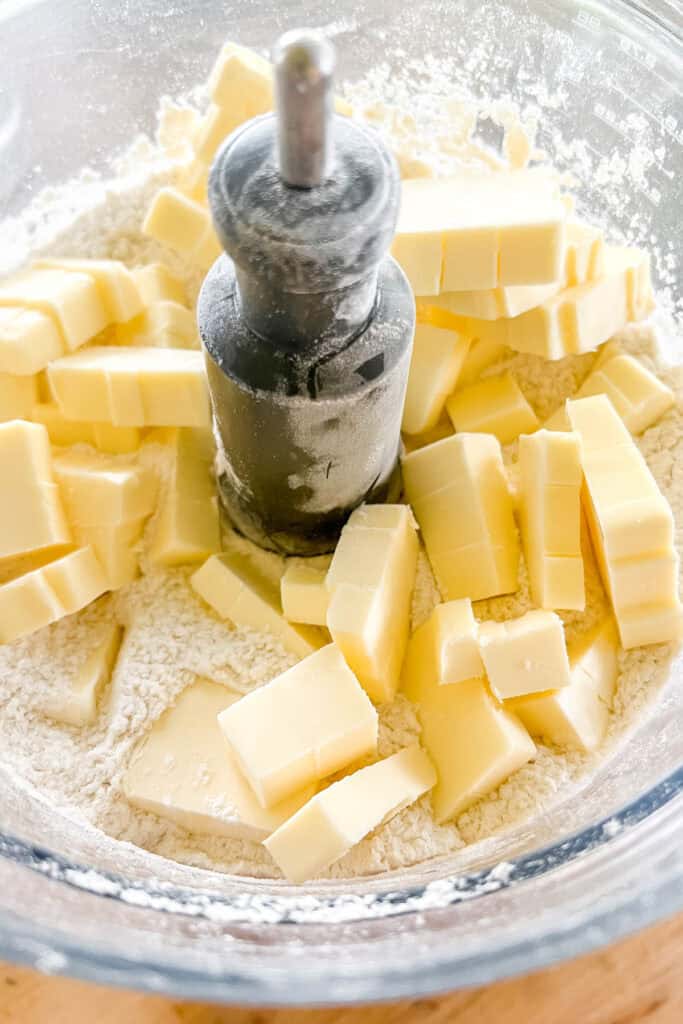
- Scatter the butter pieces overtop of the flour. Pulse the mixture 8-10 times, until the butter is the size of small peas. Transfer the mixture to a large bowl.
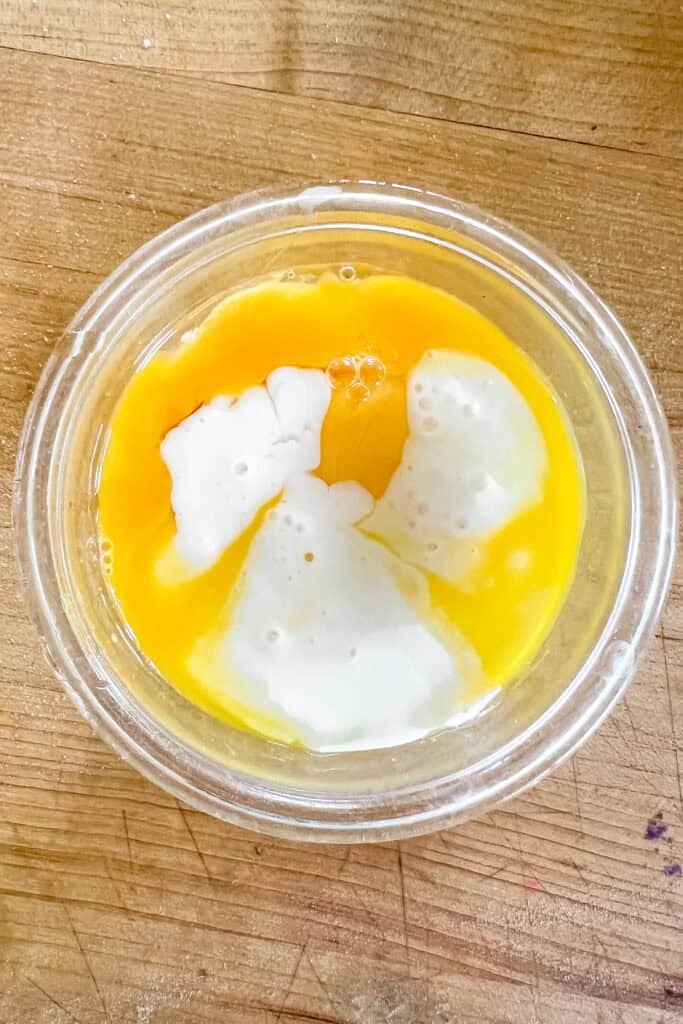
3. In a small bowl, combine the egg yolks and buttermilk.
Would you like to save this?
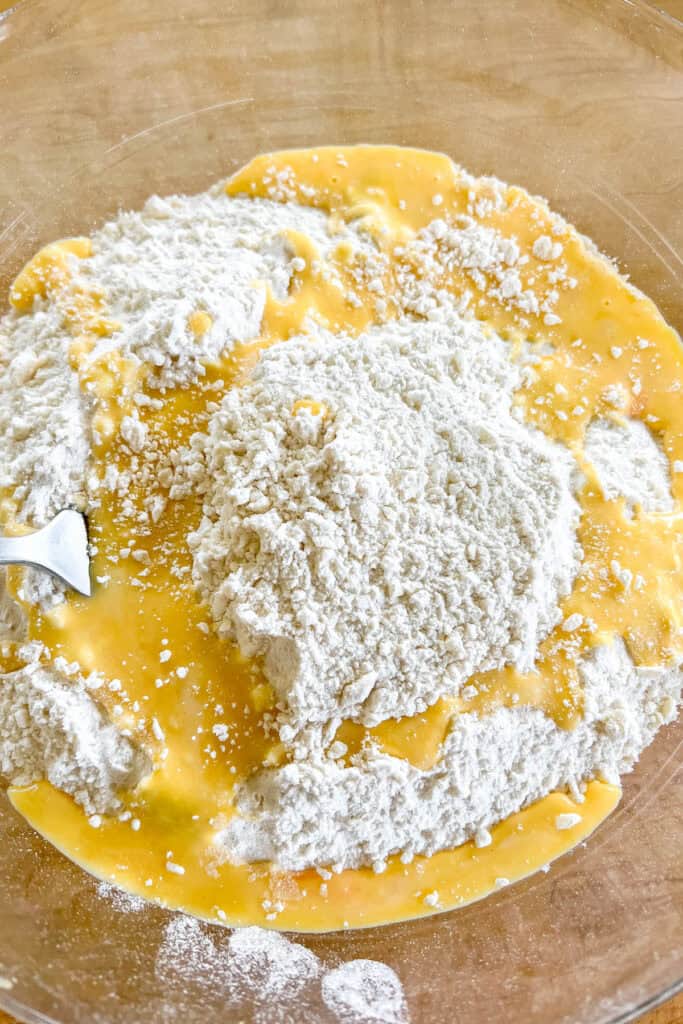
4. Pour in about half of the buttermilk mixture to the flour mixture, stirring with a fork to combine. Add the remaining buttermilk, 1 tablespoon (15 mL) at a time, stirring after each addition, until the dough begins to hold together in moist clumps. Add more buttermilk in 1 tablespoon increments if your dough isn't holding together.

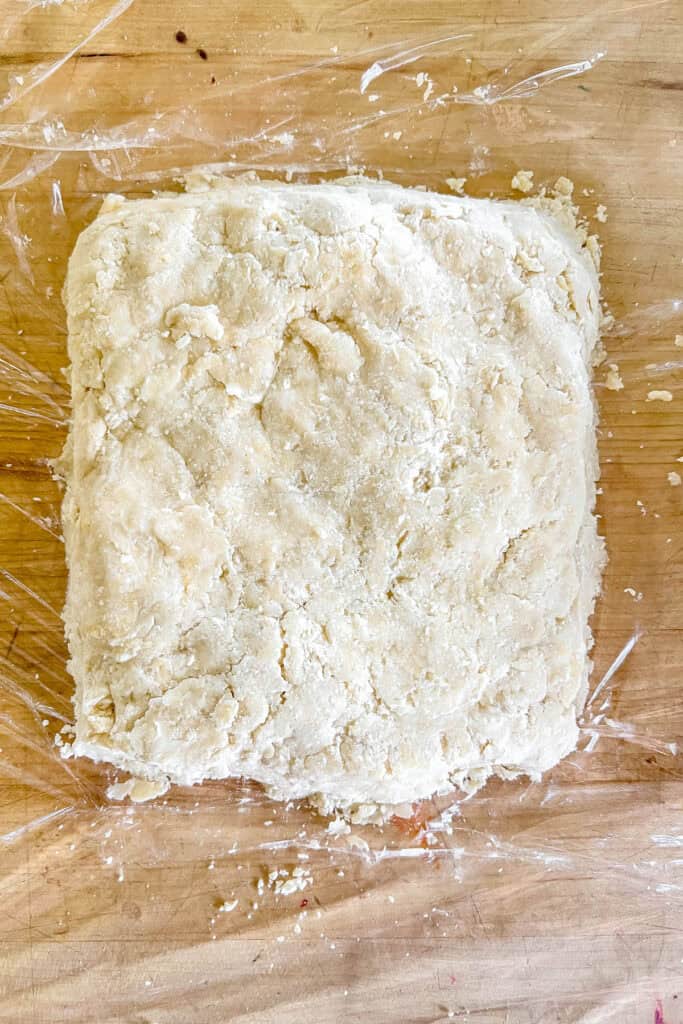
5. Divide the dough in half. Transfer half of the dough to a large piece of plastic wrap and press into a 6-inch (15 cm) square. Repeat with the other half. Wrap the squares tightly in plastic and refrigerate for at least one hour or up to two days.
Assemble the Pop Tarts
- Note: You will need to have your pop tart filling of choice on hand at room temperature or cold--about 2 tablespoon (30mL) of filling per pop tart. See the section above for my list of delicious filling suggestions.
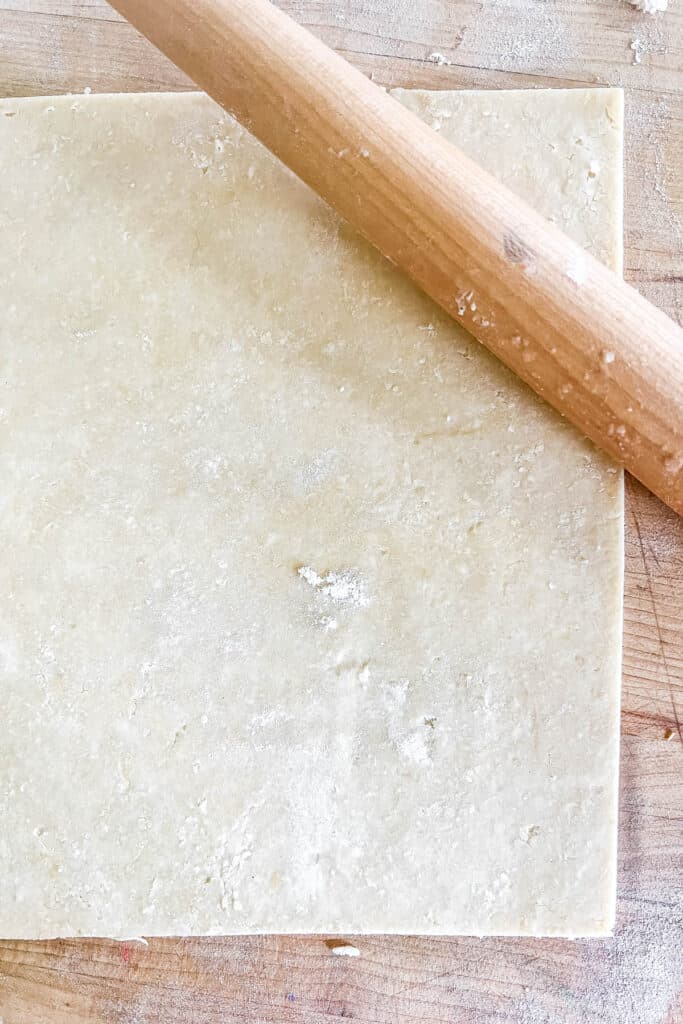
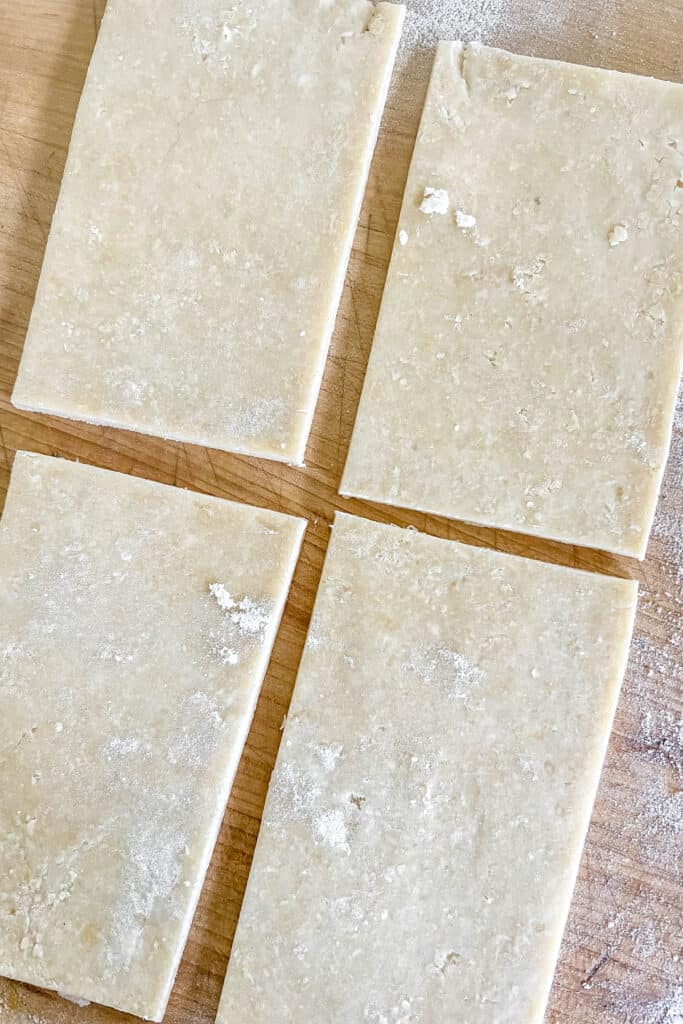
- Line two baking sheets with parchment paper. On a lightly floured surface. Roll out one of the pieces of dough to a square slightly thicker than 1/16 inch thick. Using a paring knife or a pizza cutter, trim the dough to approximately a 12-inch (30 cm) square and save the scraps.
- Cut the square into 12 rectangles, about 3 by 4 inches (7.5 by 10 cm) each. Transfer the rectangles to a prepared baking tray, spacing apart. Reroll the scraps if desired to shape about 4 more rectangles. These will be your bottom crusts. Note: If you happen to have a rectangular cookie cutter close to the same size (3 by 4 inches), but all means use that to cut out your shapes!
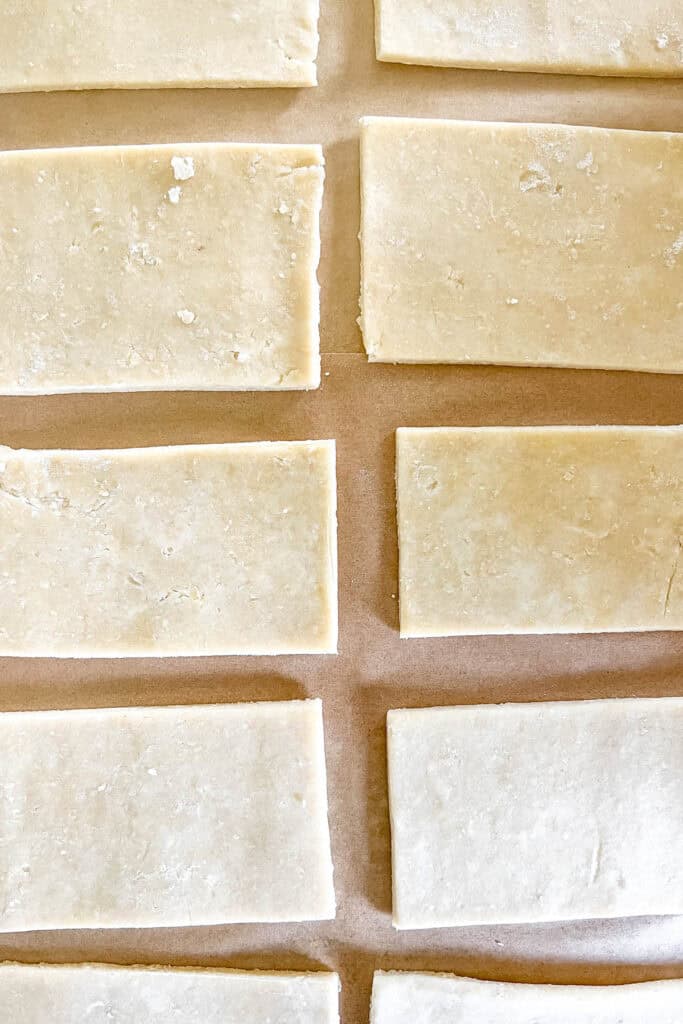
4. Repeat Step 3 with the second piece of dough, cutting an equal number of rectangles as you did for the bottom crusts. Keep these rectangles on your work surface instead of placing them on a baking sheet. These will be your top layers.
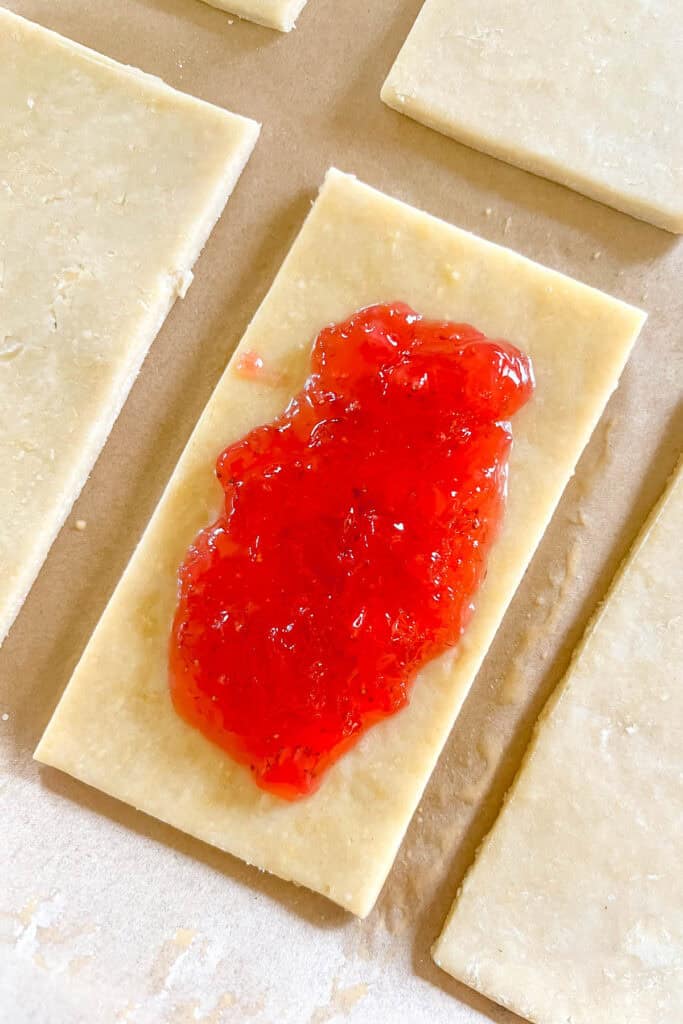
5. Brush the surfaces of your bottom crusts with the egg wash. Place about 1½ to 2 tablespoon of your filling in the center of each rectangle.
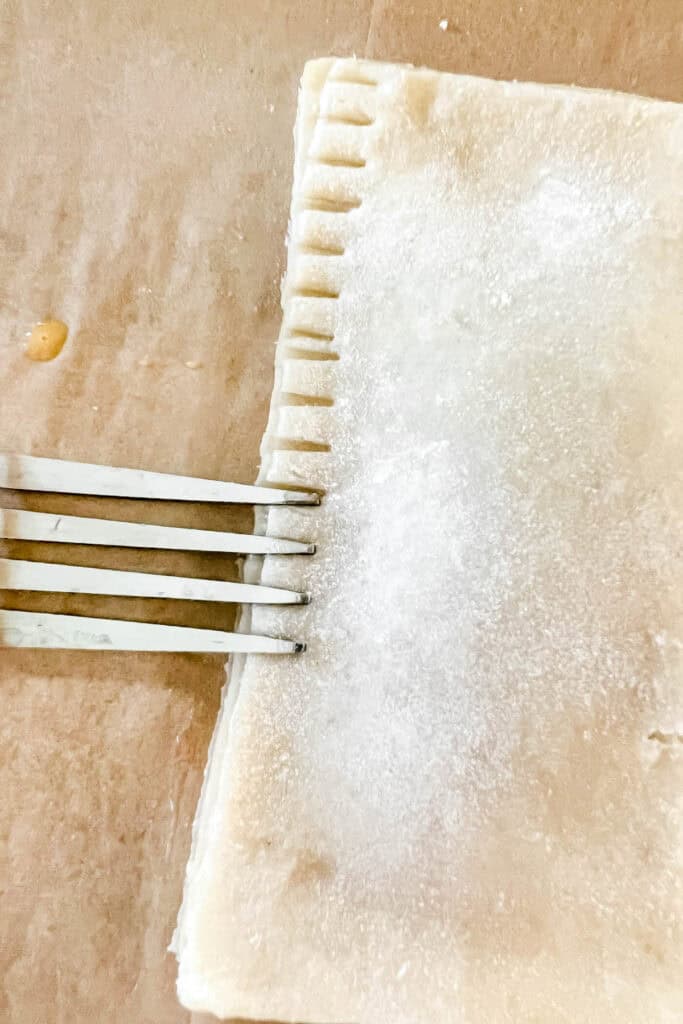
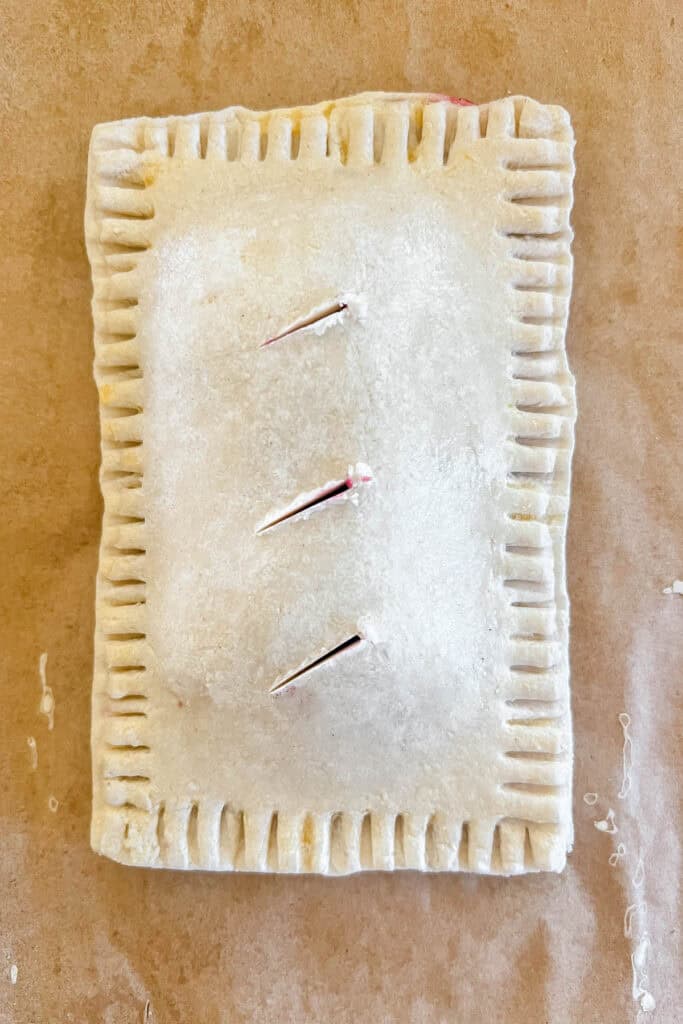
6. Place one of the top layers on top of the filling. Press the edges firmly to seal and then crimp the edges of the dough with the tines of a fork. Repeat with the remaining bottom crusts and filling.
7. Place the pop tart, on baking sheets, in the freezer for 30 minutes. Meanwhile, position your oven racks in the upper and lower thirds positions and preheat your oven to 350℉/180℃.
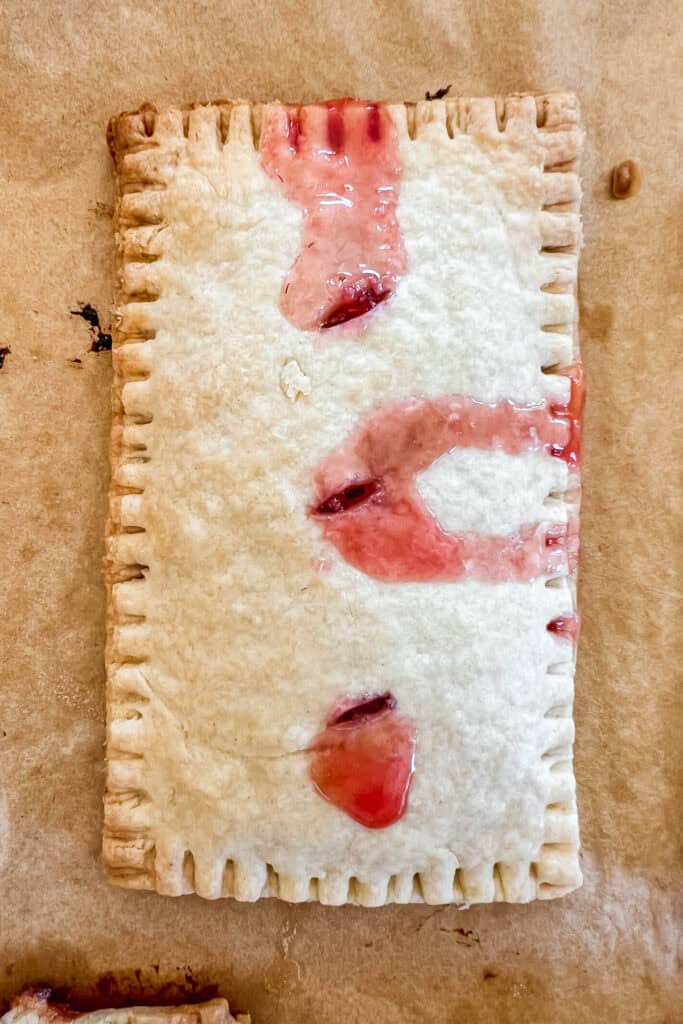
8. When you are ready to bake, cut three small slits in the tops of your pop tarts. Place the baking trays in your hot oven for 25-35 minutes, switching positions of your baking sheets halfway through, until the pies are puffed and golden brown on the tops and bottoms.
9. Let pop tarts cool for 10 minutes, then carefully transfer them to a wire rack. Decorate as directed by your specific recipe (with glaze or otherwise), or simply enjoy them warm from the oven!
Variations, Make Ahead and Storage Tips
Variations on Homemade Pop Tarts
- Crust variations: Substitute half whole wheat flour for the all-purpose flour or, as mentioned above, make the crust gluten-free. You can also simplify your process by using store-bought puff pastry instead of the pie dough, but that will result in more of a toaster strudel vs. a pop tart!
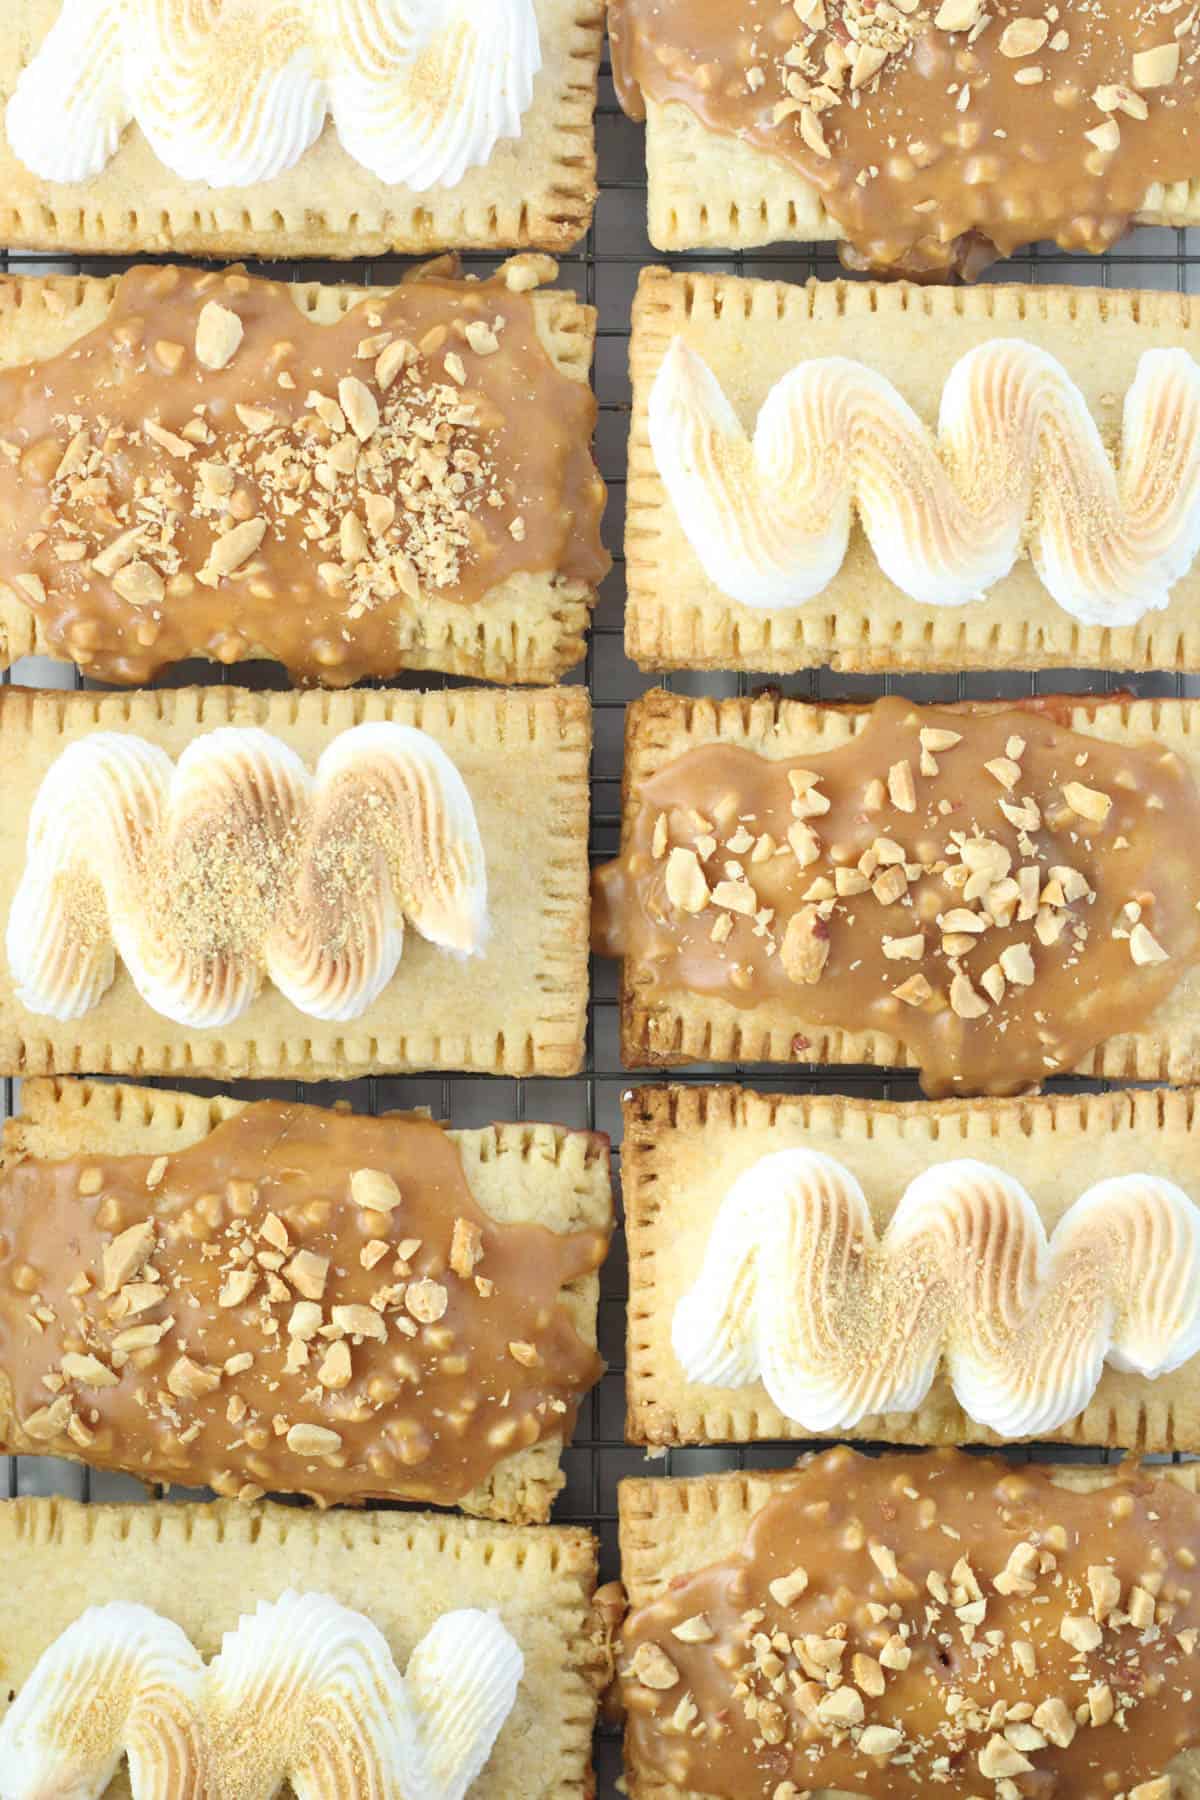
- Topping variations: After your pop tarts have cooled to warm, spread them with a sweet icing glaze, such as a simple vanilla icing, chocolate glaze, peanut butter, fruit flavored, or cinnamon glaze. For a simple topping, cool then them with powdered sugar.
- Shape variations: Instead of rectangles, shape the pop tarts into squares, circles, or even hearts!
Make Ahead and Storage tips
- Once the pastry dough has been prepared, it can be wrapped tightly in plastic wrap or put in an airtight container and refrigerated for up to two days or frozen for up to one month. Thaw the dough overnight in the refrigerator before using.
- The pop tarts can be fully assembled and frozen for up to one month. Freeze at least 30 minutes on baking sheets, then transfer the pop tarts to zip top bags between wax paper to freeze completely. Bake from frozen, as directed, adding a few minutes if necessary.
- For warm pop tarts, reheat in a 300F degree oven for 8-10 minutes until warmed through.
- Store prepared pop tarts at room temperature, tightly covered, for up to two days.
More Delicious Pie Recipes For you To Explore:
- Fried Apple Pies with Tart Cherries
- Rustic Blueberry Galette
- Flaky Hand Pie Crust Recipe (for homemade mini pies)
- Gluten Free Pie Crust Recipe
Tried this recipe and loved it? Take a photo and tag me on Instagram or give it a review!

Easy Homemade Pop Tarts (Make with Any Filling!)
Equipment
- 1 food processor (optional)
- 1 rectangular cookie cutter (optional -- see "Special Equipment" section in the post)
- 1 measuring tape (optional but helpful!)
- 1 pastry brush
Ingredients
- 3¾ cups all-purpose flour
- 3 tablespoon granulated sugar
- ¾ teaspoon salt
- 1½ cups very cold unsalted butter, cubed (3 sticks or ¾ pound)
- 3 large egg yolks
- ½ cup cold buttermilk
- Egg wash (1 large egg beaten with 1 tablespoon water)
Would you like to save this?
Instructions
Prepare Pop Tart Dough
- In the work bowl of a food processor fitted with a metal blade, pulse flour, sugar and salt to combine. (If you don't have a food processor, see the "Recommended Special Equipment" section in the post or "Notes" section below for instructions to mix by hand.)
- Scatter the butter pieces overtop of the flour. Pulse the mixture 8-10 times, until the butter is the size of small peas. Transfer the mixture to a large bowl.
- In a small bowl, combine the egg yolks and buttermilk.
- Add about half of the buttermilk mixture to the flour mixture, stirring with a fork to combine. Add the remaining buttermilk, 1 tablespoon (15 mL) at a time, stirring after each addition, until the dough begins to hold together in moist clumps. Add more buttermilk in 1 tablespoon increments if your dough isn't holding together.
- Divide the dough in half. Transfer each half to a large piece of plastic wrap and press into two 6-inch (15 cm) squares. Wrap the squares tightly in plastic and refrigerate for at least one hour or up to two days.
Assemble the Pop Tarts
- You will need to have your pop tart filling of choice on hand at room temperature or cold--about 2 tablespoon (30mL) of filling per pop tart. Feel free to search my site for options or create your own! My favorites are cherry, lemon curd with meringue, and strawberry with peanut butter topping!
- Line two baking sheets with parchment paper. On a lightly floured work surface. Roll out one of the pieces of dough to a square slightly thicker than 1/16 inch thick. Using a paring knife or a pizza cutter, trim the dough to approximately a 12-inch (30 cm) square and save the scraps.
- Cut the square into 12 rectangles, about 3 by 4 inches (7.5 by 10 cm) each. Transfer the rectangles to the prepared baking sheets, spacing apart. Reroll the scraps if desired to shape about 4 more rectangles. These will be your bottom crusts.Note: If you happen to have a rectangular cookie cutter close to the same size (3 by 4 inches), but all means use that to cut out your shapes!
- Repeat Step 3 with the second piece of dough, cutting an equal number of rectangles as you did for the bottom crusts. Keep these rectangles on your work surface instead of placing them on a baking sheet. These will be your top layers.
- Brush the surfaces of your bottom crusts with the egg wash. Place about 1½ to 2 tablespoon of your filling in the center of each rectangle.
- Place one of the top layers on top of the filling. Press the edges firmly to seal and crimp the edges with the tines of a fork. Repeat with the remaining bottom crusts and filling.
- Place the pop tart, on baking sheets, in the freezer for 30 minutes. Meanwhile, position your oven racks in the upper and lower thirds positions and preheat your oven to 350℉/180℃.
- When you are ready to bake, cut three small slits in the tops of your pop tarts. Bake in your preheated oven for 25-35 minutes, switching positions of your baking sheets halfway through, until the pies are puffed and golden brown on the tops and bottoms.
- Let the pop tarts cool for 10 minutes and then carefully transfer them to a wire rack. Decorate as directed by your specific recipe (with glaze or otherwise), or simply enjoy them warm from the oven!


I think you really chose a very delicious filling. I like apples so much. This is something that I definitely try.
Great looking dish! Make me hungry!
Thank you, Katrina! I guess that you were a bigger fan than I was. Although I had a lunchbox and figurines, I never had the record 🙂 Hope you enjoy the pop tarts.
Smurfs were MY favorite, too. I collected them and still have some of them, including the record Smurfingland. Yep, a record. What's a record?
I actually wish I could find a CD of the album. I've looked and didn't find it.
The pop tarts look de-lish! I have a bit of leftover pie dough, I just might try this.