How to Make Buttery Pull Apart Bread (From Scratch)
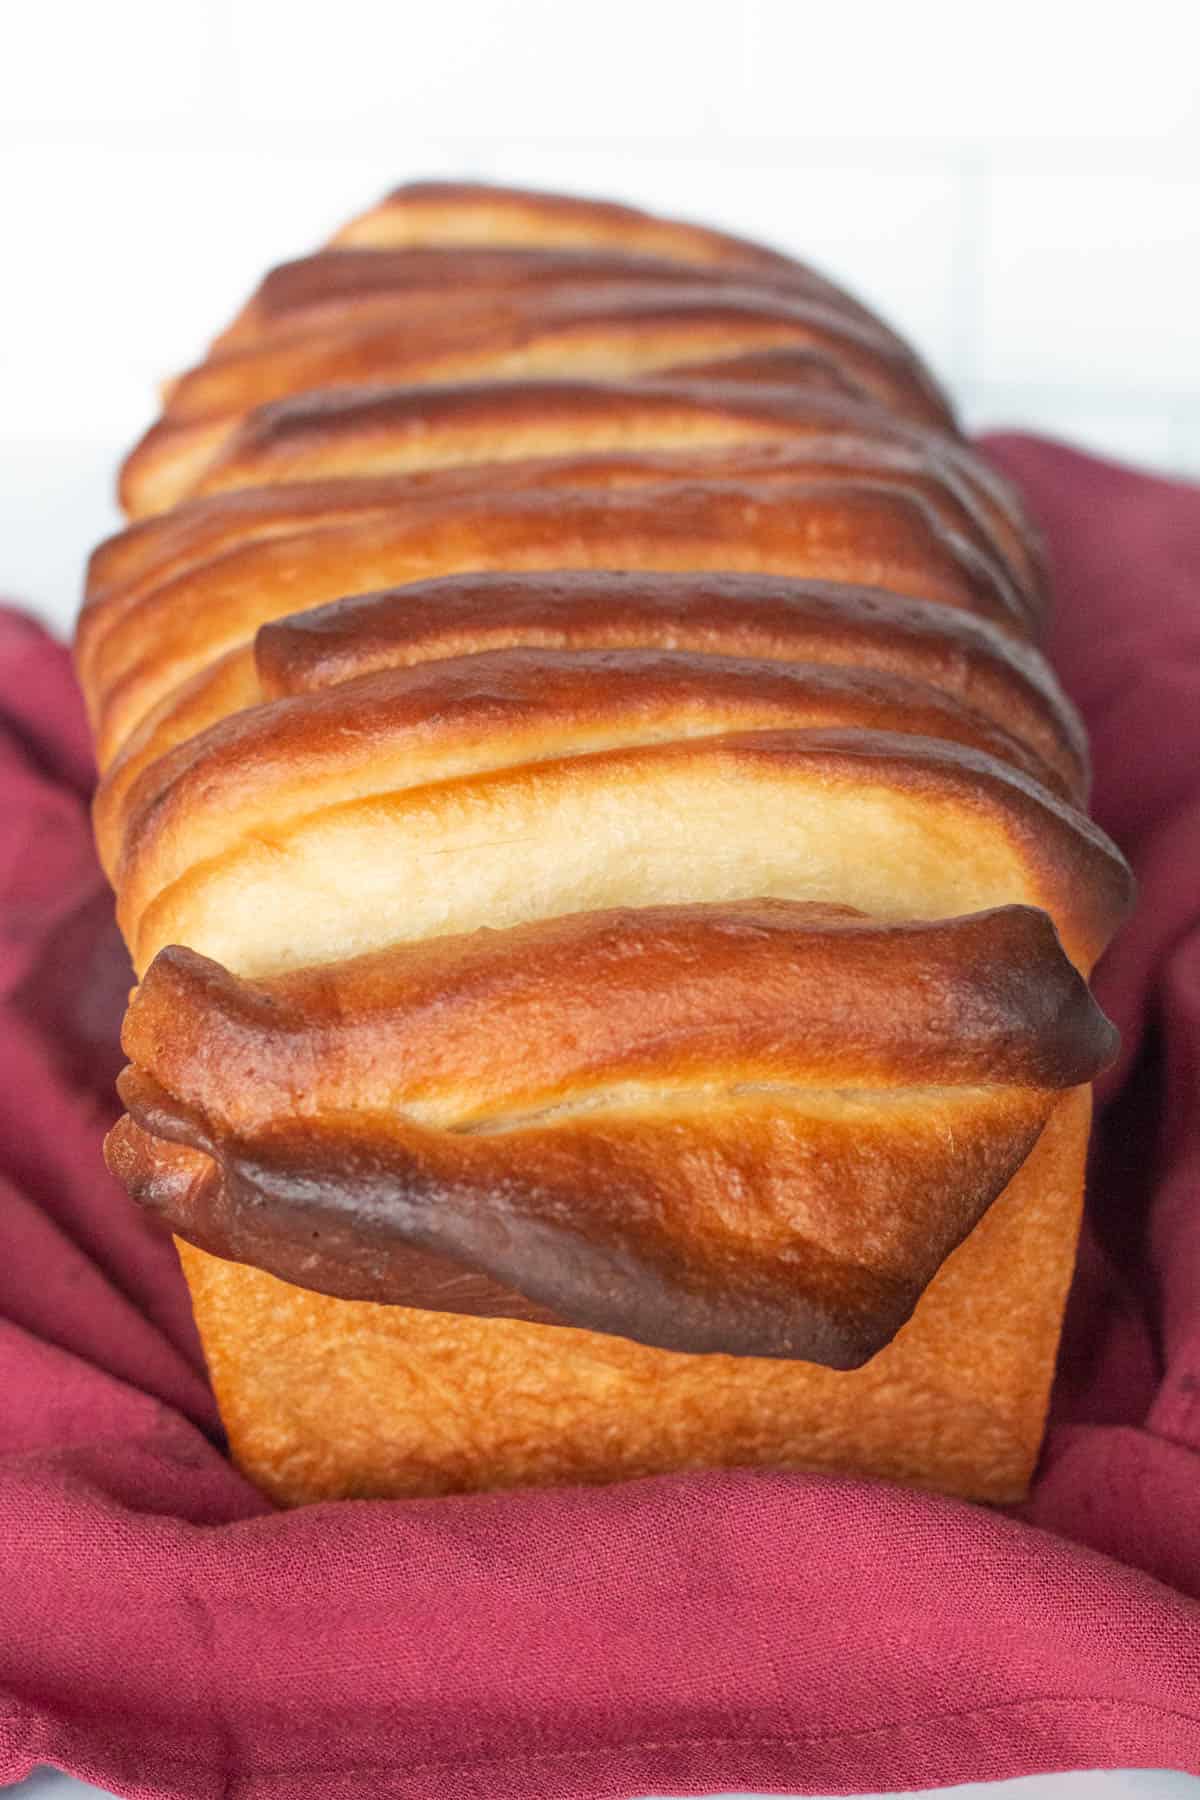
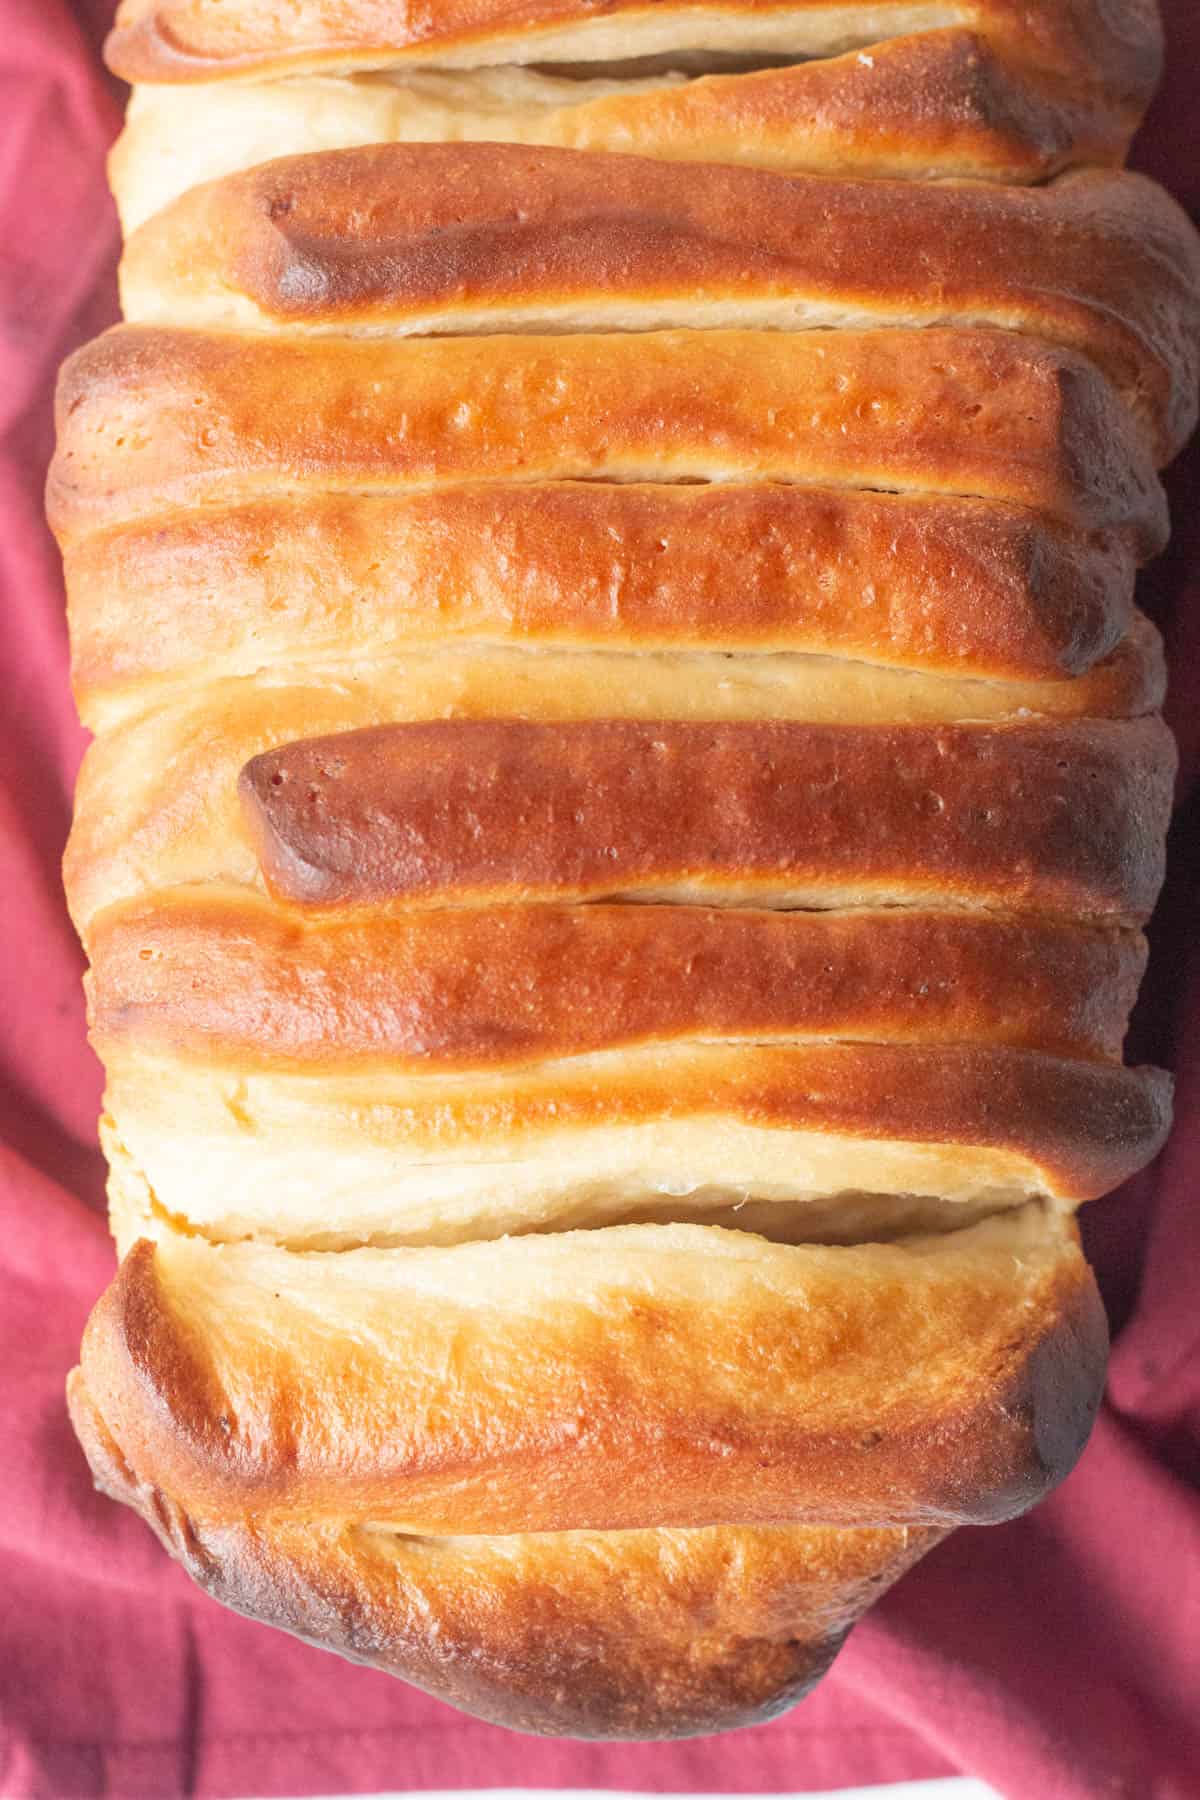
This pull apart bread recipe features an easy homemade dough that is cut into squares and layered "accordion style" in a loaf pan before baking. The result is a buttery soft bread that would be as perfect for a casual family meal as it would for an elaborate holiday feast.
Everyone Seems to Love Pull Apart Bread! Here's why:
- Easy recipe (trust me on this one!): I know that this loaf of bread looks all complicated and fancy-schmancy, but the recipe itself is very straightforward with simple ingredients. The dough is mixed all at once, and it can be left to rise in the refrigerator overnight, allowing you to break the process down into small, achievable, steps.
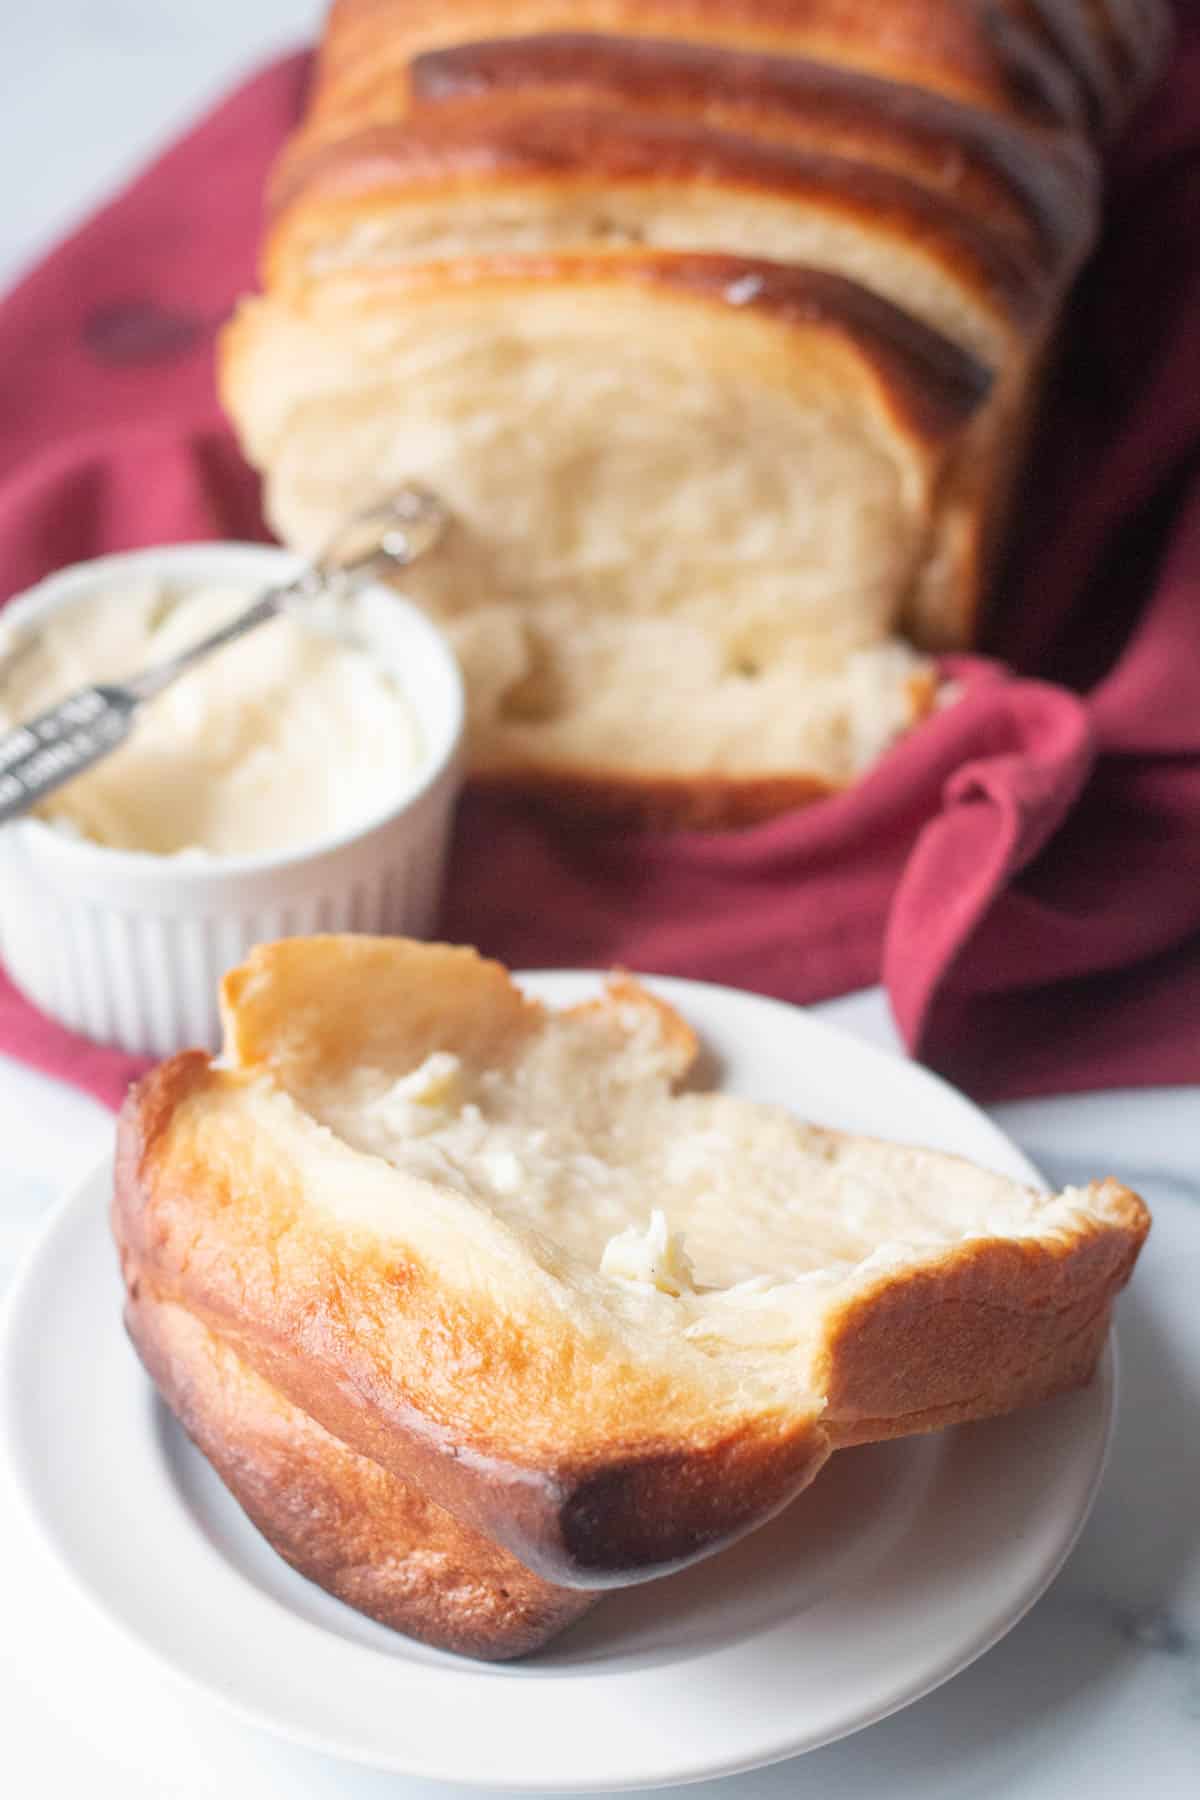
- Who knew bread could be fun?: These loaves let your whole family or friends "tear and share" fluffy layers of warm bread before slathering them with more butter. I mean, sure, you could cut it with a serrated knife, but then you'd miss out on the best part!
- Streamline with substitutions: Don't feel like making your dough from scratch? Use premade pizza dough or canned biscuit dough instead. The resulting flavor and texture will be a bit different, but if you just want to try your hand at making this accordion-style bread, these are some great shortcuts.
Ingredients, Variations, and Special Equipment
Ingredients
The ingredients for this pull-apart bread are the same as those for my Soft and Fluffy Homemade Potato Bread. They are all listed in the recipe card, below, but you can also refer to that recipe for detailed descriptions and substitutions.
Variations and Substitutions


One of the great things about pull apart bread is that it is a blank canvas for a wide variety of flavor variations, both sweet and savory. There are also different ways to bake your dough for a unique presentation. Here are a few suggestions if you want to experiment!
- Cheesy pull-apart bread - Before cutting it into squares, sprinkle your dough with any of these types of cheese (or a mix for ultimate cheesy goodness): grated Parmesan cheese, shredded mozzarella cheese, sharp Cheddar cheese....or even crumbled Feta cheese.
- Garlic herb pull-apart bread - After brushing the melted butter onto the dough, sprinkle it with fresh garlic or garlic powder and a variety of fresh herbs, such as parsley, thyme, rosemary, basil or oregano.
- Cinnamon sugar pull-apart bread - Looking to satisfy your sweet tooth? Sprinkle the melted butter with a generous amount of cinnamon sugar, and then drizzle the finished loaf with a buttery cinnamon glaze.
- Bake it in a Bundt! - Switch up the presentation by baking your pull-apart bread in a Bundt pan, as pictured above. Or, divide the dough into 48 one-inch (2.5 cm) pieces and roll each piece into a ball. Stack the balls in the Bundt pan as shown above, separating layers with melted butter, cheese, cinnamon sugar, etc....to make monkey bread.
Special Equipment Used to Make Pull Apart Bread

- 9X5 inch loaf pan: See "FAQ" section, below, for alternatives.
- Measuring tape or a ruler: Useful when rolling out your dough.
- Pastry brush: To apply the melted butter. Use a small spoon as an alternative.
- Pastry cutter or pizza wheel: Optional, but these help to cut clean strips of dough. A good sharp knife will work well, too!
Step by Step Photos and Instructions
To start, prepare one recipe of my Soft and Fluffy Homemade Potato Bread up through step 5 (the first rise.) I've also included the ingredients and method in the recipe card, below.


Shape Pull Apart Bread Loaves
- Spray two 9X5 inch loaf pans with nonstick baking spray. Remove the bowl from the refrigerator. Transfer dough to a lightly floured work surface and divide it in half. On a lightly floured work surface, roll one piece of dough into a 12X16 inch rectangle.
- Brush the top of the rectangle with about 1 tablespoon (15 ml) of the melted butter.

3. Using a pizza wheel, pastry cutter or a sharp knife, cut the rectangle lengthwise into three equal strips. Next, cut the rectangle crosswise into 5 equal strips so that you are left with 15 pieces.
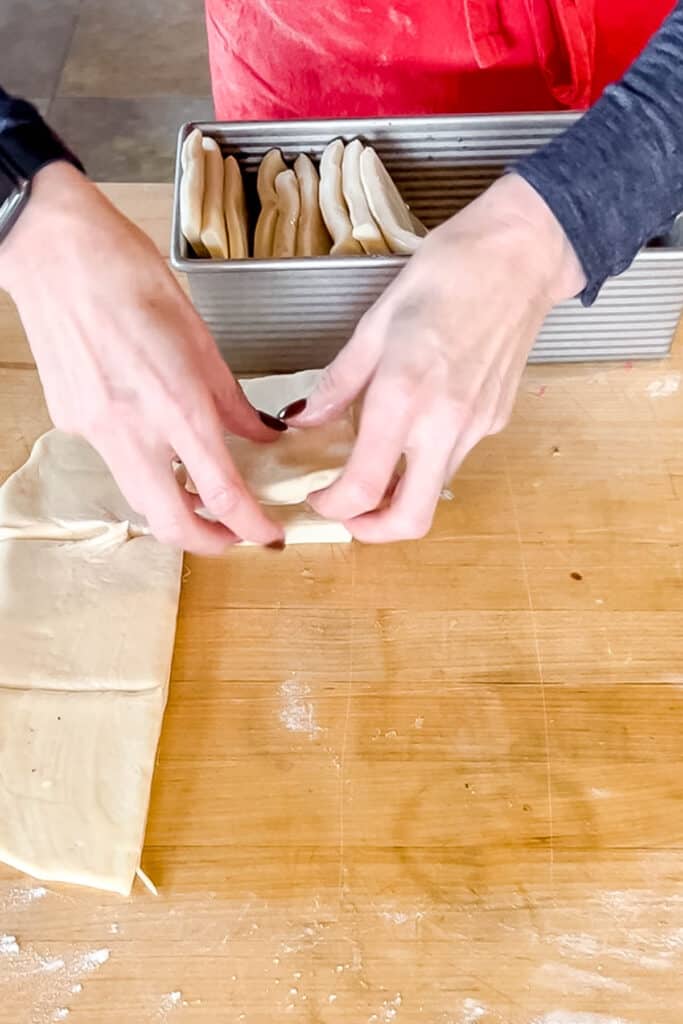
4. Stack three pieces, butter side up. Repeat until you have 5 stacks of 3 pieces.
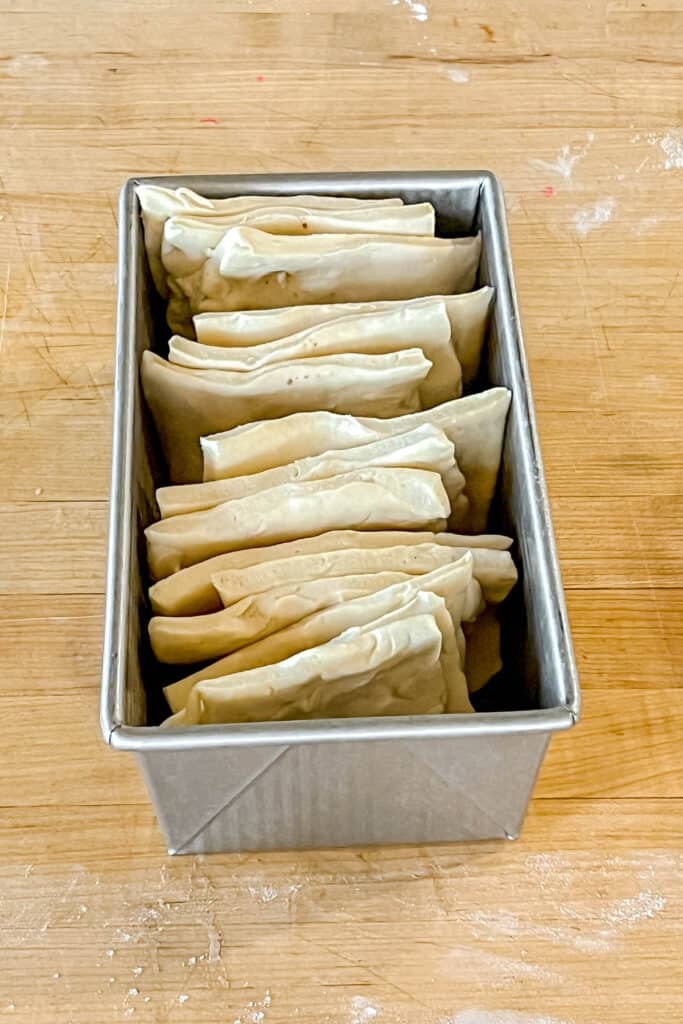
5. Turn one stack on its edge and place it in a prepared loaf pan so that the layers are against the side of the pan. Continue adding stacks to the pan, one after the other, until the stacks line the length of the pan. It's okay if the stacks aren't evenly spaced and there are gaps between them.
6. Repeat the rolling, cutting, and stacking process with the second piece of dough and loaf pan.

7. Cover the loaf pans with plastic wrap that has been sprayed with cooking spray. Let the dough rise in a warm spot until the highest section of the dough is about 1-inch over the top of the baking pan, 1½ to 2½ hours. Meanwhile, heat oven to 350℉.
8. Bake the loaves for 40-50 minutes, until they are puffed and deep golden brown on top (the center of the bread should measure at least 190℉ when checked with an instant-read thermometer.) If the bread starts to darken too much during the baking process, tent it loosely with foil halfway through.
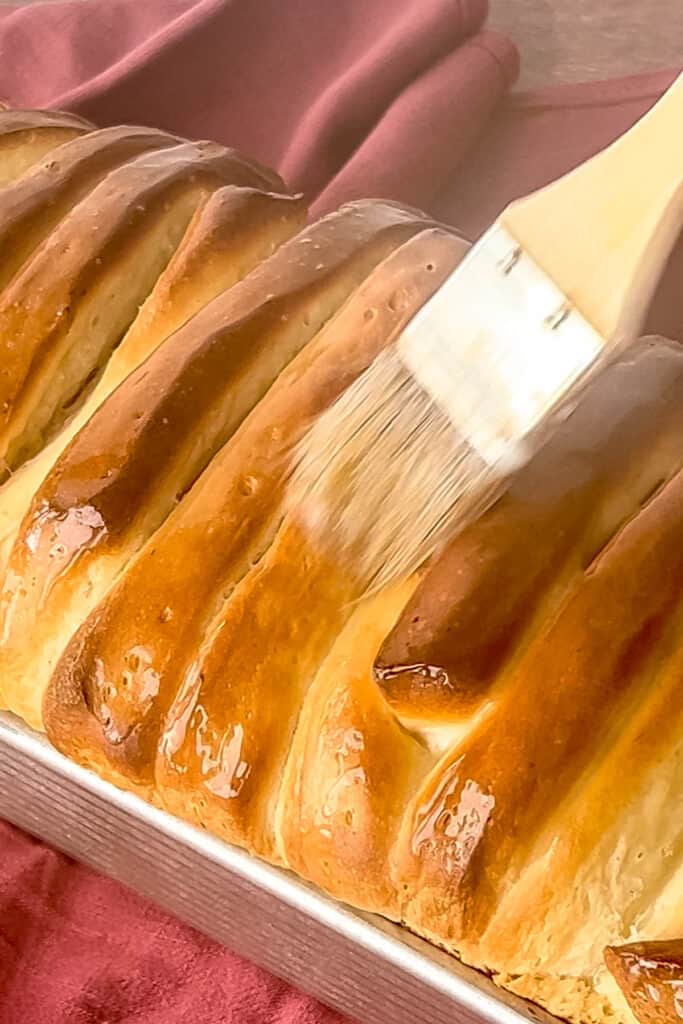
9. Remove the loaves from the oven and brush the tops with the remaining melted butter. Let the loaves cool for 5 minutes, and then invert them onto a wire rack to cool completely
FAQ and Troubleshooting your Pull Apart Bread
Store individual loaves, tightly wrapped in plastic wrap, at room temperature for 3-4 days. In cooler, dryer environments, the bread may last a few days longer. Tightly wrap baked and cooled loaves in plastic wrap and then in aluminum foil to freeze for up to one month. Defrost the loaves at room temperature overnight. To reheat bread, either pop a piece in the toaster or reheat in a 325F oven, wrapped in foil, for 10-15 minutes.
There are several reasons why your bread may not be rising as expected:
1. Inactive / expired yeast: If yeast is old, expired, or stored incorrectly, it may no longer be active. Check the expiration date on yeast and store it in a cool, dry place.
2. Water temperature: The water you use to activate the yeast should be around 110-115°F (43-46°C). Too hot water can kill yeast, while too cold may not activate it properly.
3. Proofing time: Dough needs time to proof and rise. If you don't allow enough rising time, it won't reach its full potential.
4. Over-kneading / under-kneading: These can also affect the rise.
5. Environmental factors: Temperature and humidity can impact the rise of bread. If it's too cold, the dough will rise more slowly. If it's too hot, the dough may rise too quickly and then collapse. Find a warm, draft-free spot for proofing your dough.
Yes. Although this recipe called for a 9X5 inch loaf pan, you can bake it a 8X5 or an 10X5 loaf pan. The resulting loaves will just be taller or shorter, respectively. Another fun way to present pull apart bread is in a Bundt pan. For this, spray a 12-cup Bundt with non-stick spray, and arrange all of dough pieces in the pan (as opposed to two loaf pans.) The baking time will run 10-15 minutes longer for the Bundt pan.

There is NOTHING like Homemade Bread! Here are some more of my Favorite Recipes to pair with Salty Butter
- Soft and Fluffy Homemade Potato Bread Recipe
- Easy Popovers With Lemon and Thyme
- Homemade Brioche Buns
Tried this recipe and loved it? Take a photo and tag me on Instagram or give it a review!

How to Make Buttery Pull Apart Bread
Equipment
- 2 9X5 inch loaf pans
- 1 pastry brush
- 1 pastry cutter or pizza wheel
- 1 tape measure or ruler
- 1 Rolling Pin
Ingredients
- 1 recipe Soft and Fluffy Homemade Potato Bread dough Use link for detailed post or follow ingredients and recipe, below. If using the linked recipe, follow it through Step 5 and then follow these instructions for shaping pull apart loaves.
- 4 teaspoon instant yeast
- ⅔ cup granulated sugar
- ¾ cup warm whole milk (95-105℉)
- ¾ cup warm water (95-105℉)
- ¾ cup unsalted butter, softened
- 3 large eggs, room temperature
- 1¼ cups mashed potatoes
- 2 teaspoon kosher salt
- 6½ cups all-purpose flour (add up to ¼ cup more, if needed)
- 5 tablespoon melted butter (for brushing the dough and baked loaves)
Instructions
Prepare Potato Bread Dough
- In the bowl of your stand mixer, fitted with the paddle attachment, beat together the yeast, sugar, milk, water, butter, eggs, mashed potatoes and salt until combined.
- Add four cups of the flour and continue to beat the mixture for 3-4 minutes at medium-high speed, stopping to scrape down the sides of the bowl as necessary, until smooth.
- Switch the paddle attachment to the dough hook. Gradually add the remaining 2½ cups of flour at medium speed until incorporated.
- Continue to knead for 6 minutes more, stopping to scrape down the sides of the bowl every few minutes, until the dough is smooth, soft, and slightly sticky. (Add up to ¼ cup more flour during the kneading process if your dough is very sticky or you're in an exceptionally humid environment.)
- Gather the dough into a ball and place it in a lightly greased bowl. Cover the bowl with plastic wrap and refrigerate for at least 4 hours or overnight. This should give the dough time for a nice, slow rise so that it doubles in bulk.
Shape Pull Apart Bread Loaves
- Spray two 9X5 inch loaf pans with nonstick baking spray. Remove the bowl from the refrigerator. Transfer the dough to a lightly floured work surface and divide it in half. On a lightly floured work surface, roll one piece of dough into a 12X16 inch rectangle.
- Brush the top of the rectangle with about 1 tablespoon (15 ml) of the melted butter.
- Using a pizza wheel, pastry cutter or a sharp knife, cut the rectangle lengthwise into three equal strips. Next, cut the rectangle crosswise into 5 equal strips so that you are left with 15 pieces.
- Stack three pieces, butter side up. Repeat until you have 5 stacks of 3 pieces.
- Turn one stack on its edge and place it in a prepared loaf pan so that the layers are against the side of the pan. Continue adding stacks to the pan, one after the other, until the stacks line the length of the pan. It's okay if the stacks aren't evenly spaced and there are gaps between them.
- Repeat the rolling, cutting, and stacking process with the second piece of dough and loaf pan.
- Cover the loaf pans with plastic wrap that has been sprayed with nonstick spray. Let the dough rise until the highest section of the dough is about 1-inch over the top of the baking pan, 1½ to 2½ hours. Meanwhile, preheat your oven to 350℉.
- Bake the loaves for 40-50 minutes, until they are puffed and deep golden brown on top (the center of the bread should measure at least 190℉ when checked with a digital thermometer.) If the bread starts to darken too much during the baking process, tent it loosely with foil halfway through.
- Remove the loaves from the oven and brush the tops with the remaining melted butter. Let the loaves cool for 5 minutes, and then invert them onto a wire rack to cool completely.
Notes
- Store individual loaves, tightly wrapped in plastic wrap, at room temperature for 3-4 days. In cooler, dryer environments, the bread may last a few days longer. Tightly wrap baked and cooled loaves in plastic wrap and then aluminum foil to freeze for up to one month. Defrost at room temperature overnight.