Homemade Brioche Buns
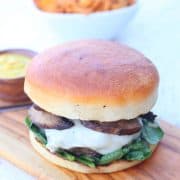
Nothing says "cook-out" like a good old-fashioned burger, amiright? Usually there is so much focus on the patty itself--how much seasoning, turkey or beef, what type of cheese--that the bun is all but forgotten about until the very last minute. Well, not anymore!! These surprisingly easy Homemade Brioche Buns will make those flimsy grocery store versions a thing of the past. This recipe right here (well, technically at the bottom of the page) is your golden opportunity to take your burgers and sandwiches to the next level!
Why homemade brioche buns are the way to go
Imagine how great this scenario would be: Your most hard-to-please family member asks you which bakery made the incredible hamburger buns. You breezily reply, "Oh those? I just made them myself this morning, as I was doing other things of course." Priceless. These buns don't require much labor or attention, just ample time to rise, so if started first thing in the morning, they really could be ready for lunch.
This recipe makes a generous 20-24 fluffy, buttery homemade brioche buns. This means you can either feed a crowd....or feed a few and have plenty leftover to freeze for your future burger endeavors. Might I suggest my award winning Best Juicy Burger Recipe for one of those?
And have you seen the price of bread, lately? These are way....waaaayyy more affordable!
So, to sum it all up, these buns are low-maintenance, crowd pleasing, economical, AND {obviously} delicious. You really have no reason not to make them.
Ingredients and special equipment
- Active dry or instant yeast: One ¼-ounce package of yeast is equivalent to 2 ¼ teaspoons, so for this recipe, you will need a little more than two whole packets. You can also buy my favorite brand of instant yeast in bulk, here. Once opened, store it in an airtight container in the refrigerator, keeping note of its expiration date! When you first combine the yeast and warm water, if the yeast doesn't foam after five minutes, then throw it out and start over. This indicates that the yeast is no longer active, and as a result the dough will not rise.
- Granulated sugar
- Warm water: In order to activate the yeast, water temperature should be between 105-115F.
- Unsalted butter: Softened and cut into pieces so that it will easily blend into the dough
- Whole milk: If you use whole milk, the resulting dough will be richer, but you may substitute 2% or lowfat. I do not recommend using nonfat milk. Like the water, warm the milk to between 105-115F before adding to the dough.
- Eggs: Lightly beat the eggs before adding them to the dough.
- Kosher salt
- All-purpose flour: This recipe can be made using all white flour or with a mixture of white and whole wheat flours.
- 3-inch round cutter: If you don't have a 3-inch cookie, biscuit, or pastry cutter, then use the top of a glass to measure the rounds.
- Stand mixer: If you don't have an standing electric mixer, just stir all of the ingredients together with a wooden spoon until a dough forms. Then, knead the dough on a floured surface until smooth and elastic, about 7 to 8 minutes.
- Pastry brush: This is used to brush butter onto the tops of the dough. If you don't have a pastry brush, you can spoon a small amount of butter onto each round and then spread it with the back if the spoon.
Step by step photos and instructions
- Add yeast, 1 teaspoon of the sugar, and the warm water in the bowl of an electric mixer; stir to mix. Let the mixture stand until it is fragrant and very foamy, about 5 minutes.
2. Add the warm milk, butter, eggs, remaining sugar to the yeast mixture and mix with the paddle attachment on medium-low speed until blended.
3. Add the salt and 6 cups of the flour, one cup at a time, mixing until incorporated.
4. Switch out the paddle attachment for the dough hook and mix in an additional ½ cup flour. Increase the speed to medium, and mix the dough until it pulls away from the sides of the bowl, about 3 minutes more, adding up to ½ cup more flour (1 tablespoon at a time) if needed. Continue to mix the dough for 3 more minutes, until a soft, sticky dough forms.
Would you like to save this?
5. Transfer the dough an oiled bowl. Cover the bowl with plastic wrap and let the dough rise until doubled in bulk, 1½ to 2 hours.
6. Butter two baking sheets (don't use parchment in this recipe as the bottoms of the buns won't brown enough if you do.) Punch down the dough and turn it out onto a lightly floured work surface. Roll out the dough to a thickness of about ½ inch.
7. Use a 3-inch cutter to cut out as many rounds as possible, spacing the rounds apart on the prepared baking sheets. Reroll the scraps and cut out more rounds.
8. Loosely cover the rounds with plastic wrap and let them rise until they are very puffy, 1 to 1½ hours. While the rounds are rising, preheat your oven to 375 °F.
9. Brush the tops of the rounds with half of the melted butter. Bake until the tops and undersides of the buns are deep golden brown, 15-20 minutes. Brush the tops with the remaining melted butter. Cool completely.
Frequently asked questions
Active dry and instant yeasts can be used interchangeably in recipes, but there are some differences. Active dry yeast requires proofing or activation (as the name implies) before it is used in a recipe. It needs to be dissolved in warm water (between 105°F to 115°F) with a small amount of sugar to "feed" it. Proofing takes around 5 minutes, and creates a foamy, bubbly mixture. Instant yeast, does not require proofing and can be directly added to the dry ingredients in a recipe.
Recipes that use instant yeast often have shorter rising times. Active dry yeast requires a longer rising time due to the additional step of proofing.
Brioche is a soft, lightly sweet bread that is used in both sweet and savory recipes. Because brioche is made from an "enriched" dough, it has a softer texture than regular buns. The enriched brioche dough contains butter, milk, eggs, and sugar, giving it a fluffier, richer, taste and texture after baking.
There are various reasons as to why your yeast rolls aren't light and fluffy. First, you could have added too much flour in the kneading process, making the dough too heavy. Second, you may not have given the dough ample time to rise, resulting in dense, unfluffy rolls. Make sure that the rolls are noticeably puffy before finishing the proofing process and baking them.
Video: see these Homemade Brioche Buns in action!
Make Homemade Brioche Buns part of your next outdoor feast with these recipes:
- The Best Juicy Burger Recipe
- Maple Rum Baked Beans
- Spinach Salad with Maple Dijon Dressing
- Coconut Lemon Bundt Cake
Tried this recipe and loved it? Take a photo and tag me on Instagram or give it a review!
Homemade Brioche Buns
Equipment
- 1 3-inch round cutter optional, see Notes
- 1 stand mixer with a dough hook see Notes for alternatives
- 1 pastry brush
Ingredients
- 5 teaspoon active dry or instant yeast
- ⅓ cup granulated sugar (divided)
- ¼ cup water (warm: 105 °F to 115 °F)
- 1¾ cups whole milk (warm: 105 °F to 115 °F)
- 6 tablespoon unsalted butter (room temperature, cut into pieces)
- 2 large eggs (lightly beaten)
- 1 tablespoon kosher salt
- 7 cups all purpose flour
- 6 tablespoon melted butter for brushing tops
Would you like to save this?
Instructions
- Add yeast, 1 teaspoon of the sugar, and the warm water in the bowl of an electric mixer; stir to mix. Let the mixture stand until it is fragrant and very foamy, about 5 minutes.
- Add the warm milk, butter, eggs, remaining sugar to the yeast mixture and mix with the paddle attachment on medium-low speed until blended.
- Add the salt and 6 cups of the flour, one cup at a time, mixing until incorporated.
- Switch out the paddle attachment for the dough hook and mix in an additional ½ cup flour. Increase the speed to medium, and mix the dough until it pulls away from the sides of the bowl, about 3 minutes more, adding up to ½ cup more flour (1 tablespoon at a time) if needed. Continue to mix the dough for 3 more minutes, until a soft, sticky dough forms.
- Transfer the dough an oiled bowl. Cover the bowl with plastic wrap and let the dough rise until doubled in bulk, 1½ to 2 hours.
- Butter two baking sheets (don't use parchment in this recipe as the bottoms of the buns won't brown enough if you do.) Punch down the dough and turn it out onto a lightly floured work surface. Roll out the dough to a thickness of about ½ inch.
- Use a 3-inch cutter to cut out as many rounds as possible, spacing the rounds apart on the prepared baking sheets. Reroll the scraps and cut out more rounds.
- Loosely cover the rounds with plastic wrap and let them rise until they are very puffy, 1 to 1½ hours. While the rounds are rising, preheat your oven to 375 °F.
- Brush the tops of the rounds with half of the melted butter. Bake until the tops and undersides of the buns are deep golden brown, 15-20 minutes. Brush the tops with the remaining melted butter. Cool completely.
Video

Notes
- When you first combine the yeast and warm water, if the yeast doesn't foam after five minutes, then throw it out and start over. This indicates that the yeast is no longer active, and the dough will not rise.
- One ¼-ounce package of yeast is equivalent to 2 ¼ teaspoons, so for this recipe, a little over two packets.
- If you don't have an standing electric mixer, just stir all of the ingredients together with a wooden spoon until a dough forms. Then, knead the dough on a floured surface until it is very smooth and elastic, about 7 to 8 minutes.
- The baked buns can be frozen, tightly wrapped or sealed in a zip-top bag, for up to 1 month.
- If you don't have a 3-inch cookie cutter, then use the top of a glass to measure the rounds.


Burger buns look soft n nice. Thanks for sharing
they looks nice and soft. i too made bread just the other day. need to give this a try. thnx for sharing
I've never made my own hamburger buns...those look really good. You have inspired me to try.
Hi Julie,
These look adorable! I was planning on making black bean burgers this week and still need to get the buns - maybe I'll give these a shot.
T