Royal Icing Recipe for Sugar Cookies (with Meringue Powder)
Royal icing is a cookie decorator's best friend, and it's the recurring character in each of the thousands of cookies I've decorated over the years. This recipe is the one that I've used for every holiday cookie, theme party cookie, and for every single design in my cookbook, 100 Best Decorated Cookies. Bonus: it pairs perfectly with my signature Vanilla Orange Sugar Cookies. So, if you've never decorated with royal icing before but have always wanted to give it a try, then you've come to the right place!

Royal Icing 101: Everything you need to know to get started!
Icing consistency
When you use royal icing to decorate cookies, it will be one of three consistencies: piping icing, flooding icing or "two-step" icing (my personal favorite.)
Piping icing
Piping icing is the thickest of the three. Similar in texture to toothpaste, piping icing holds its shape without spreading. This consistency squeezes out of a piping bag with light pressure. It is used to outline shapes and add detail work.
Flooding icing
Flooding refers to the technique of filling cookies or sections of cookies that have been outlined with piping icing. This icing is thinned enough so that it spreads easily. This consistency is reached by adding lemon juice or water to piping icing a little bit at a time until the icing has a thickness of room temperature honey.
One good test for consistency is the "ribbon test." Using a spoon, drizzle a ribbon of icing across the top of your bowl. If the ribbon completely disappears in 4-6 seconds, leaving a glossy surface, you have reached flooding consistency.
Two-Step icing

I've named this icing "two step icing" because it allows you to accomplish two steps in one, outlining and flooding, without switching tools. Two step icing has the texture of hair gel or cool honey, slightly thicker than flooding icing. It is thick enough to hold its shaped when piped, but thin enough to create a smooth surface when used for flooding. I almost always use this consistency, as it is easiest and most efficient.
To reach "two step" consistency, add liquid to piping icing a tiny bit at a time, stirring after each addition. Use the ribbon test mentioned above, but this time your ribbon should disappear in about 15 seconds as opposed to 4-6 seconds with flooding icing.
Food colorings: Liquids vs. gels
You have a choice when it comes to the type of food coloring that you use: liquid or gel paste. Both will stain your hands and clothing, so be careful when mixing!
Liquid food coloring
Liquid food coloring is the standard coloring found in your grocery store baking aisle. I almost never use liquid coloring for decorating, as it affects the consistency of the royal icing.
Gel paste
Gel paste color is more concentrated and the paste's thicker texture does not affect the icing's consistency. It comes in both small and large bottles, so I recommend buying larger bottles of commonly used colors and smaller bottles of specialty colors. There are many good brands of gel paste available, but my favorite is Americolor.
Filling a piping bag
Follow these easy instructions when filling your piping bag with icing!

- Separate the coupler (see Tools section, below) so that you have two pieces. Place the tube shaped piece inside the pastry bag so that the smaller opening faces the bag's tip.
- Use scissors to snip off the tip of the bag so that the hole is just large enough for the tube to peek through.
- Place the desired piping tip (see Tools section) over the coupler tube to that it covers the end of the bag.
- Place the coupler's screw top over the tip and twist to secure tightly.
- Fold the wide end of the bag over itself. Use a large spoon to transfer icing to the bag, filling it about halfway.
- Unfold the bad and secure it with a rubber band or twist tie positioned at the top of the icing.
Filling a squeeze bottle
Squeeze bottles are used for both flooding icing and "two-step" icing. The best way to fill one is by pouring the icing directly from its bowl into the bottle. A bowl with a spout or a glass measuring cup with a spout makes this process both easy and mess-free.

Getting ready to decorate
Here are a few of my expert tips for setting up your cookie decorating studio:
- Read through instructions: Take a few minutes and read through the instructions of your design as well as those of the sugar cookie dough and the icing. This way, there will be no surprises along the way.
- Make a list: Go through all of the steps and make sure that you have all of the necessary tools and ingredients.
- Create a timeline: Many cookies are a two day process if there are multiple layers involved. It helps to give yourself at least a full day to complete a design, but two days is optimal.
- Set out spoons and bowls: Have several of both on hand to mix colors.
- Have towels and parchment paper handy: Keep plenty of towels nearby for easy cleanup. It also helps to have parchment paper to line work surfaces.
- Wear an apron!!
- Prepare your icing all at once: This is one of the more time consuming tasks. Once it is done, however, decorating cookies is much more streamlined. Get all of your icing colored, thinned and transferred to bottles or piping bags.
- Give yourself space: There are lots of moving parts involved in cookie decorating. Clear away any items you are not currently using so you can focus on the task at hand.
Ingredients needed to make royal icing

Confectioners' (icing) sugar
Confectioners' sugar is the main ingredient used to make royal icing. My recipe calls for 2lb (1kg) of sugar, which yields about 6 cups of icing, but it can easily be halved.
Meringue powder
Meringue powder consists of powdered egg whites, cornstarch and stabilizers. It is the key ingredient for getting your royal icing t set and dry.
Although some people make royal icing using egg whites or powdered egg whites, I prefer meringue powder as I find the results to be more consistent. If you don't have meringue powder, see the Troubleshooting section below on how to safely substitute egg whites.
Would you like to save this?
You can find meringue powder in the baking aisle of most craft stores, but I usually buy it in bulk online.

Flavorings and flavor variations for royal icing
Depending on the flavor of my sugar cookie (i.e chocolate, vanilla, spice), I most often flavor my royal icing with either tart lemon juice or more common vanilla extract. Here are some other variations for your to mix and match!:
- Peppermint royal icing: Replace the lemon juice with 1 to 2 teaspoon (5 to 10 ml) peppermint extract, depending on how minty you like the flavor.
- Coconut royal icing: Replace the lemon juice with 1 to 2 teaspoon (5 to 10 ml) coconut extract.
- Maple royal icing: Replace the lemon juice with 1 to 2 teaspoon (5 to 10 ml) maple extract. Since this extract tends to be dark in color, it may slightly darken the color of your icing. Use white gel paste to bring the color back to its original white.
- Orange or lemon royal icing: Replace ¼ cup (60 ml) of the water with orange or lime juice.
- Almond royal icing: Replace the lemon juice with 1 to 2 teaspoon (5 to 10 ml) almond extract.
Special tools for decorating cookies

Piping bags / Pastry bags
Piping bags are available in disposable and non-disposable forms, in a variety of sizes. I usually use 12-inch (30 cm) bags for the purpose of decorating cookies. In a pinch, a large zip-top bag can serve as a decent substitute, but they are not as sturdy, so I don't recommend them on a regular basis.
Couplers
Couplers are two piece plastic tools that connect decorating tips to piping bags. While they are not necessary for decorating cookies, I find them useful if you plan to change a tip while decorating. Also, bags fitted with couplers tend to leak less than bags fitted with tips only.
Piping tips
Piping tips are available in both metal and plastic, but I use metal as they retain their shapes better. Tips come in all shapes and sizes, but the most common ones that I use for decorating are #1, #2, #3, and #5 round tips.
Squeeze bottles
Plastic squeeze bottle are great tools for decorating using my Two-Step Icing (see above.) They allow you to outline and flood cookies without switching tools. Some squeeze bottle come with a small round tip attached, while others are specifically made for cookie decorating. These bottles allow you to attach a coupler and a tip size of your choice.
Other tools
- Scissors: Handy for snipping the tip off of a piping bag or squeeze bottles
- Rubber bands: Use these to secure the end of your pastry bag and prevent the icing from oozing out of the top
- Gel paste food coloring: See above for benefits of using this over liquid colors
- Mixing bowls: Used to divide icing and mix colors
Step by step photos and instructions

- In the bowl of your mixer, beat sugar and meringue powder on low speed until well combined.


2. With the mixer on low speed, gradually add water and then lemon juice, mixing until combined. At this point, the icing will be fairly runny (don't worry!)


3. Increase mixer speed to medium and mix for 4 minutes, stopping to scrape down sides of the bowl as necessary.

4. Increase mixer speed to high and beat for 3 to 5 minutes more or until icing is stiff and glossy and the paddle attachment can stand up in the icing without sinking.

How to store your royal icing
Royal icing can be stored for up to 1 week, tightly covered in bowls, either at room temperature or in the refrigerator. If the icing separates during this time (which is likely), stir it until it returns to the right consistency.
Icing can also be stored in squeeze bottles for a few days. But if you see the colors separating, transfer the icing to a bowl, stir it, and then return it to the bottle.
Troubleshooting tips for royal icing
If you have a heavy hand with the water or lemon juice when thinning the icing, your icing will be too runny. Watery icing can be fixed by mixing in sifted confectioners' sugar in small amounts until the desired consistency is reached.
Tiny air bubbles are common in freshly mixed icing because of the whipping motion used to make it. To prevent the bubbles from appearing on your beautifully smooth surface, let freshly mixed icing rest for a few minutes so that bubbles can settle, or mix the icing at a very low speed for a few minutes to coax out the bubbles. If bubbles are visible on the surface of your cookie after flooding, pop them with the tip of a toothpick or a clean needle.
If icing is stored for more than a day or two, it often starts to separate. To fix this, stir it until it had returned to the desired consistency. Don't store icing in a pastry bag for more than a day, as it is very hard to rebound the icing in the bag.
Royal icing can be made with egg whites in place of meringue powder, but be sure to use only pasteurized eggs so that food safety is not an issue.
1. Use 3 egg whites for every pound of confectioner's sugar.
2. In a mixing bowl beat the egg whites at medium speed to break them up. On low speed, gradually add the powdered sugar, about 1 cup at a time.
3. Once all the sugar is incorporated, increase the speed to medium-high and continue to beat for about 5-7 minutes until the icing becomes thick, glossy, and forms stiff peaks.
4. If desired, add lemon juice for flavor.

Ready to try your hand at decorating some cookies? Check out these designs!
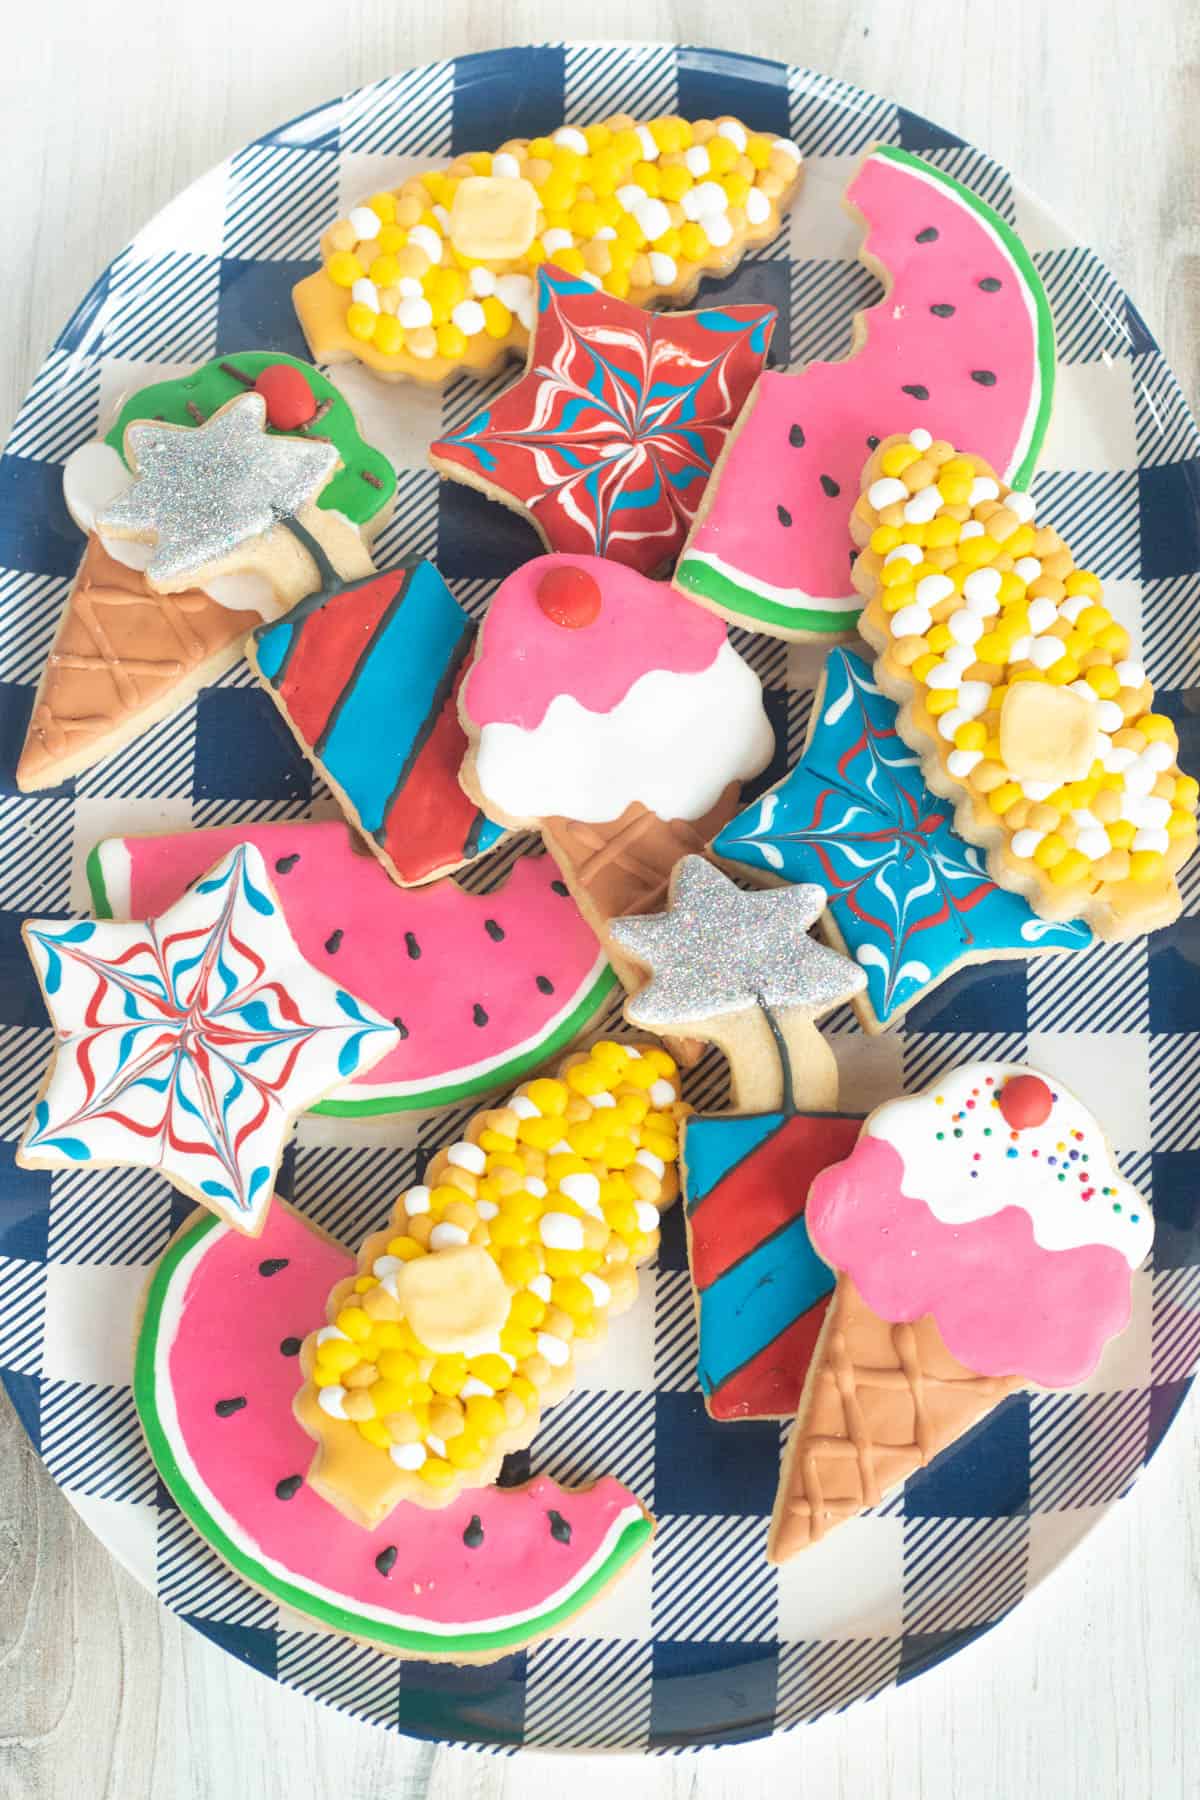
- 4th of July Cookies
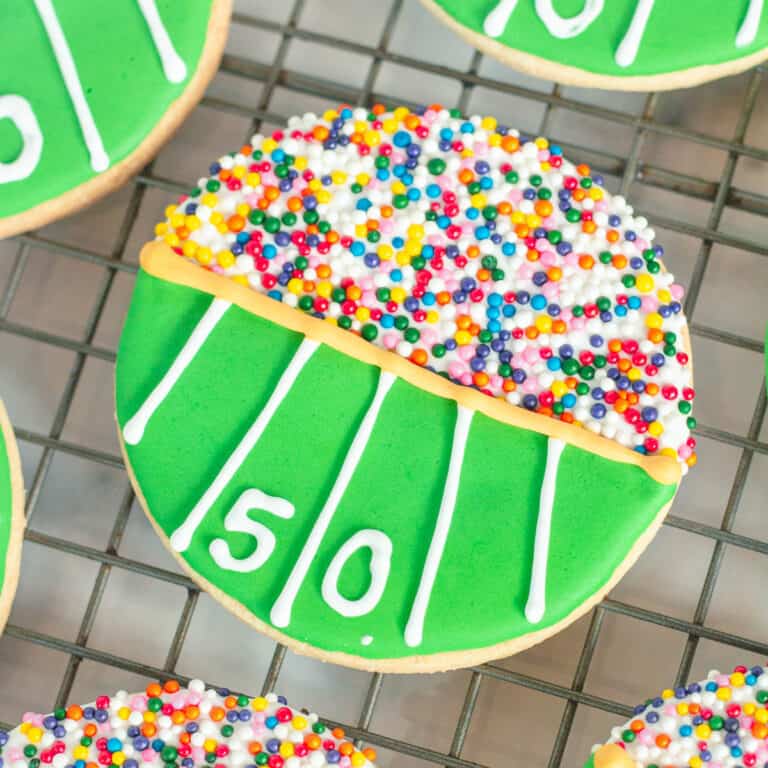
- FUN Football Cookies
- Hocus Pocus Party Cookies
- Spinning Pinwheel Cookies
- Beautiful Butterfly Cookies
Tried this recipe and loved it? Take a photo and tag me on Instagram or give it a review!

Royal Icing for Decorated Cookies
Equipment
- 1 stand mixer fitted with the paddle attachment or handheld electric mixer
Ingredients
- 2 lbs confectioner's sugar
- 6 tablespoon meringue powder
- 14 tablespoon warm water
- 1 tablespoon freshly squeezed lemon juice or vanilla extract
- Extra lemon juice or water for thinning icing, as needed
Would you like to save this?
Instructions
- In the bowl of your mixer, beat sugar and meringue powder on low speed until well combined.
- With the mixer on low speed, gradually add water and then lemon juice or vanilla, mixing until combined. At this point, the icing will be fairly runny (don't worry!)
- Increase mixer speed to medium and mix for 4 minutes, stopping to scrape down sides of the bowl as necessary.
- Increase mixer speed to high and beat for 3 to 5 minutes more or until icing is stiff and glossy and the paddle attachment can stand up in the icing without sinking.
Notes
- If you don't have a stand mixer, a handheld electric mixer will work fine--it might just take a few extra minutes for the icing to reach the proper consistency.
- If substituting another flavor for the lemon juice, keep in mind that adding too much of an oil-based flavoring can cause royal icing to break down and affect how well it sets. See variations, above in the blog post, for some flavoring options that work well.


Absolutely love this recipe. It is my go to recipe!
Thank you, Debra! I've lost count of how many times I've made this, so I'm glad to hear you love it, too. Happy decorating!!
Julie
This royal icing recipe is easy to make, dries hard, and is perfect for decorating cookies.
Thank you so much! I'm happy that you had success with the recipe....I know that I've probably made it over 100 times!! Enjoy your week 🙂
Awesome pictures and information ♥️♥️♥️
Thank you so much! I'm glad you found the post to be helpful!